home touch steamer instruction manual

Product Overview

The Home Touch Steamer is a versatile garment steamer designed for safe, efficient fabric care. It features quick heat-up, an integrated hanger, and a Safe Touch hose for comfortable use.

The Home Touch Steamer is a high-quality garment steamer designed for efficient fabric care. Available in models like IBPS200-C and PS-200, it offers quick heat-up in 45 seconds, an integrated garment hanger, and a Safe Touch hose for safe handling. With a water tank capacity providing up to 40 minutes of continuous steaming, it’s perfect for household use, ensuring smooth and wrinkle-free fabrics effortlessly.

1.2. Key Features of the Home Touch Steamer

The Home Touch Steamer stands out with its advanced features, including a fast 45-second heat-up time, an integrated garment hanger, and a telescoping design for compact storage. It also includes a 5-foot flexible hose with a Safe Touch cover for safe handling. The easy-fill water tank provides up to 40 minutes of continuous steaming, making it ideal for various fabrics and household needs. Additionally, it comes with a brush attachment for versatile cleaning tasks.

1.3. Compatible Models (PS-200, PS-251, IBPS200-C)

The Home Touch Steamer is available in three models: PS-200, PS-251, and IBPS200-C. The PS-200 is a compact, user-friendly option, while the PS-251 offers deluxe features for enhanced performance. The IBPS200-C is designed for commercial use, providing robust steam output for heavy-duty applications. All models share core functionalities, ensuring consistent performance across the range. Each model is tailored to meet specific user needs, whether for home, deluxe, or commercial use.

Safety Precautions

Always read the manual before use to avoid accidents. Keep the steamer away from children and pets. Never touch hot surfaces or direct steam at living beings.

2.1. General Safety Guidelines

Before using the Home Touch Steamer, ensure the power supply matches the specified 120V AC. Avoid using chemicals or substances other than tap water. Keep children and pets away. Never direct steam at people, animals, or plants. Do not touch hot surfaces or the upper part of the steamer during operation. Follow all instructions carefully to ensure safe and effective use.

2.2. Avoiding Burns and Accidents

To prevent burns, avoid touching hot surfaces like the steam nozzle or upper body of the steamer during operation. Keep children and pets away from the device. Never direct steam at people, animals, or plants, as it can cause injury. Use the Safe Touch hose for added protection and ensure the steamer is placed on a stable surface to avoid tipping. Always monitor its use to prevent accidents.

2.3. Warnings for Use Around People, Animals, and Plants

Keep the steamer away from children and pets to prevent accidental burns. Never direct steam at people, animals, or plants, as it may cause injury or damage. Ensure the device is placed on a stable surface to avoid tipping. Always maintain a safe distance from living organisms while operating the steamer to prevent harm.

Technical Specifications

The Home Touch Steamer operates on 120V AC power, producing continuous steam for up to 40 minutes. It features a 5-foot flexible hose and quick 45-second heat-up time for efficient fabric steaming.

3.1. Power Supply Requirements

The Home Touch Steamer requires a 120V AC power supply to function properly. Ensure the appliance is plugged into a grounded electrical outlet to avoid damage or electrical hazards. Using a different voltage may result in malfunction or safety risks. Always follow the power specifications outlined in the manual to maintain optimal performance and safety during operation.

3.2. Steam Output and Heat-Up Time

The Home Touch Steamer emits steam in just 45 seconds after turning it on, ensuring quick and efficient fabric care. It delivers continuous steam output for up to 40 minutes, making it ideal for multiple garments or extended use. The steamer is designed to maintain consistent steam flow, ensuring optimal results for various fabrics.

3.3. Water Tank Capacity and Continuous Steaming Time

The Home Touch Steamer features an easy-fill water tank that provides up to 40 minutes of continuous steaming. This capacity ensures efficient use for multiple garments or extended sessions. The tank is designed for convenience, allowing users to refill water without interrupting the steaming process. This makes it ideal for both home and professional settings, offering consistent performance for various fabric care needs.

Operating Instructions

Plug the steamer into a 120V AC outlet, turn the switch on, and wait 45 seconds for steam. Use the reset button if needed for troubleshooting.

4.1. Assembly and Initial Setup

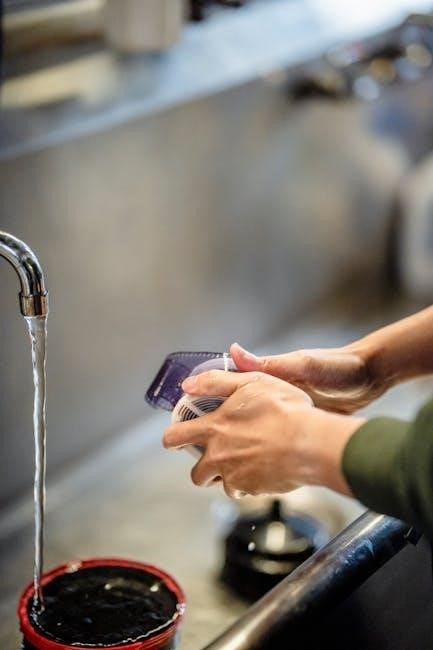
Unpack the steamer, brush attachment, and measuring cup. Attach the steam hose to the main unit and hangar. Plug into a 120V AC outlet. Fill the water tank with tap water using the measuring cup. Ensure all connections are secure. Check for leaks. Turn on the power and allow the steamer to heat up before first use.

4.2. First-Time Use and Preparation

Plug the steamer into a 120V AC outlet. Turn on the switch; the indicator light will illuminate. Allow 45 seconds for heat-up. Steam should emit from the nozzle. Before first use, ensure all parts are securely connected. Check for leaks and proper water level. Use the measuring cup to fill the tank with tap water. Avoid overfilling. Let the steamer run for a few minutes to ensure proper function.

4.3. Daily Operation and Maintenance Tips

For optimal performance, ensure the water tank is filled with tap water only, avoiding chemicals. After each use, empty the tank and dry it to prevent mineral buildup. Regularly clean the steam nozzle to maintain flow. Store the steamer upright in a cool, dry place. Descale every 2-3 months if using hard water. Always check for damage before each use and ensure all parts are securely connected.

4.4. Reset Button and Troubleshooting

The reset button (Fig. 9) is designed to restore the steamer to its default settings if it malfunctions; Press and hold it for 5 seconds to reset. Common issues include no steam output, often due to low water levels or a blocked nozzle. Check the power supply, ensure the water tank is filled, and clean the nozzle regularly. If issues persist, unplug the device, allow it to cool, and restart. Refer to the manual for detailed troubleshooting guides.

Common Issues and Solutions

The Home Touch Steamer may experience no steam output due to low water levels or blockages. Ensure the water tank is filled and the nozzle is clean. The black button function aids in troubleshooting by resetting the device if it malfunctions, restoring normal operation quickly and efficiently.

5.1. No Steam Output: Possible Causes and Fixes

If the Home Touch Steamer stops producing steam, check for common issues like low water levels, blockages, or mineral buildup. Ensure the water tank is filled and the nozzle is clear. Descale the unit regularly to prevent lime buildup. Avoid using chemicals or substances other than tap water, as this can damage the steamer. If issues persist, reset the device using the black button or consult the troubleshooting guide for further assistance.

5.2. Understanding the Black Button Function

The black button on the Home Touch Steamer serves as a reset feature, helping to restore normal operation when issues arise. Pressing it can resolve problems like no steam output or malfunctioning components. It also aids in clearing internal blockages or errors. Use this button cautiously, as it resets all settings. Refer to the manual for specific scenarios when to use this function to ensure optimal performance and troubleshoot effectively.

Additional Features and Accessories

The Home Touch Steamer comes with a brush attachment for tough stains and a measuring cup for precise water filling, enhancing its functionality and ease of use.

6.1. Brush Attachment and Its Uses

The Home Touch Steamer includes a brush attachment designed for tackling tough stains and delicate fabrics. It helps remove dirt and odors effectively while preserving fabric integrity. Use it for upholstery, curtains, or heavy-duty cleaning. The brush attachment enhances the steamer’s versatility, making it ideal for various household and garment care needs; It ensures a deeper clean without damaging materials, providing a gentle yet thorough cleaning experience.

6.2. Measuring Cup and Water Guidelines

The measuring cup ensures accurate water levels for optimal steaming performance. Use only tap water, as chemicals or additives can damage the steamer. Fill the water tank up to the maximum level indicated to avoid operational issues. For hard water areas, consider using distilled water to prevent limescale buildup. Always allow the steamer to cool before refilling to ensure safety and longevity of the device.

Warranty Information

The Home Touch Steamer comes with a comprehensive warranty covering manufacturing defects for a specified period. Register your product for extended support and easy claim processing online.

7.1. Coverage and Duration

The Home Touch Steamer warranty covers manufacturing defects in materials and workmanship for a period of one year from the date of purchase. Registration is required to activate the warranty. Damages caused by misuse or improper maintenance are not covered. Proof of purchase and adherence to the instruction manual are necessary for valid claims;

7.2. Registration and Claim Process

To activate the warranty, register your Home Touch Steamer on the manufacturer’s website with proof of purchase. For claims, contact Home Touch customer support, providing the product serial number, purchase date, and a detailed description of the issue. Claims must comply with warranty terms and conditions outlined in the manual. Ensure all documentation is complete to facilitate a smooth process.

The Home Touch Steamer offers efficient fabric care with advanced features and safety measures. Follow the manual for optimal performance and longevity of your steamer.

8.1. Final Tips for Optimal Use

For the best results, always check fabric labels before steaming and use distilled water to prevent mineral buildup. Regularly clean the steam nozzle and descale the unit to maintain performance. Store the steamer upright and empty the water tank after use to avoid bacterial growth. Use the brush attachment for tougher fabrics and ensure the garment is slightly damp for effective steaming. Follow these tips to extend the life of your Home Touch Steamer and achieve professional-quality results at home.

8.2. Importance of Following the Instruction Manual

Following the instruction manual ensures safe and effective use of the Home Touch Steamer. It helps prevent damage to fabrics, avoids appliance malfunction, and guarantees optimal performance. By adhering to guidelines, users can maintain warranty coverage and extend the product’s lifespan. Always read the manual before first use to understand safety precautions, proper assembly, and maintenance tips. This ensures a seamless and hazard-free steaming experience.

About the Brand

Home Touch is a trusted brand committed to delivering high-quality, innovative products like the PerfectSteam series, ensuring reliability and customer satisfaction in household appliances.

9.1. Home Touch and Its Commitment to Quality

Home Touch is dedicated to providing premium products that combine innovation and durability. Their commitment to quality ensures that every device, like the PerfectSteam series, meets high standards, offering reliability and efficiency. By focusing on user safety and satisfaction, Home Touch has established itself as a trusted name in household appliances, delivering exceptional performance and value.

9.2. Other Products in the PerfectSteam Series

Home Touch offers an array of products in the PerfectSteam series, each designed to meet diverse steaming needs. From compact models like the PS-200 to advanced versions such as the IBPS200-C, these steamers deliver efficient performance. Accessories like brush attachments and measuring cups enhance functionality, making the series a comprehensive solution for fabric care and beyond, ensuring versatility and convenience for users.

e-z-go golf cart troubleshooting manual

This manual provides a comprehensive guide for diagnosing and resolving common issues in E-Z-Go golf carts, covering electrical, mechanical, and battery-related problems.

Designed for both novice and experienced users, it offers detailed instructions to ensure optimal performance and longevity of your E-Z-Go vehicle through effective troubleshooting and maintenance.

Overview of the Manual’s Purpose and Scope

This manual is designed to help users identify and resolve common issues in E-Z-Go golf carts, ensuring optimal performance and longevity. It covers a wide range of topics, including battery maintenance, electrical system diagnostics, and mechanical repairs. The guide provides step-by-step instructions for troubleshooting and repairing problems, as well as preventive maintenance tips. Whether you’re addressing battery discharge issues or diagnosing electrical malfunctions, this manual offers detailed solutions. It also emphasizes safety precautions and the use of proper tools, making it an essential resource for both novice and experienced users. By following the guidelines, you can extend the lifespan of your E-Z-Go golf cart and ensure reliable operation.

  • Covers electrical, battery, and mechanical systems.
  • Includes troubleshooting steps and maintenance schedules.
  • Emphasizes safety and proper tool usage.

Importance of Regular Maintenance and Troubleshooting

Regular maintenance and troubleshooting are crucial for ensuring the longevity and reliability of your E-Z-Go golf cart. Neglecting routine checks can lead to premature wear of components, reduced performance, and increased repair costs. By addressing issues early, you can prevent minor problems from escalating into major repairs. This manual provides guidance on identifying warning signs, performing essential checks, and resolving common issues promptly. Consistent upkeep not only enhances the cart’s efficiency but also guarantees a safer and more enjoyable user experience. Stay proactive to maintain your investment in top condition and avoid unexpected breakdowns.

  • Prevents premature component wear.
  • Reduces costly repairs and downtime.
  • Ensures optimal performance and safety.

Common Issues in E-Z-Go Golf Carts

Common issues in E-Z-Go golf carts include battery-related problems, electrical system malfunctions, and mechanical faults. These problems can affect performance and require timely troubleshooting and repair.

Battery-Related Problems

Battery-related issues are common in E-Z-Go golf carts, often stemming from improper charging, deep discharging, or faulty terminals. Corrosion on terminals and cables can disrupt power flow, causing operational problems. Overcharging or undercharging can reduce battery lifespan, while extreme temperatures may affect performance. Regular maintenance, such as checking water levels and cleaning connections, can prevent these issues. Testing voltage and specific gravity helps diagnose battery health. Replacing worn-out cables and ensuring proper charging practices are essential for optimal functionality and longevity of the electrical system.

Electrical System Malfunctions

Electrical system malfunctions in E-Z-Go golf carts often manifest as sudden power loss, erratic motor behavior, or illuminated warning lights. Common issues include blown fuses, tripped circuit breakers, or faulty solenoids. Corrosion in connectors or loose wiring can disrupt communication between components, causing intermittent operation. Faulty controllers or motors may also lead to system failures. Diagnosing these issues requires checking voltage levels, testing solenoid functionality, and inspecting wiring for damage or corrosion. Referencing the service manual and using a digital multimeter (DVOM) can help pinpoint problems. Addressing electrical malfunctions promptly ensures reliable performance and prevents further damage to the system.

Mechanical Issues and Faulty Components

Mechanical issues in E-Z-Go golf carts often stem from worn or faulty components, such as brakes, axles, or steering systems. Common problems include uneven tire wear, noisy operations, or difficulty in steering. Faulty brakes may result in reduced stopping power, while worn axles can cause vibrations or instability. Regular inspections of suspension and chassis components are crucial to identify potential issues early. Lubricating moving parts and replacing worn components can prevent mechanical failures. If symptoms persist, consulting a professional or referring to the service manual is recommended to ensure proper repairs and maintain the cart’s performance.

Safety Precautions Before Troubleshooting

Ensure safety by disconnecting the battery and wearing protective gear. Use jack stands to stabilize the cart before starting any repairs. Always follow the manufacturer’s guidelines.

Immobilizing the Golf Cart

Immobilizing the golf cart is crucial for safety before troubleshooting. Disconnect the battery charger and ensure the cart is on a level surface. Engage the parking brake firmly to prevent any movement. For added stability, block the wheels with sturdy objects like wooden wedges or metal stands. If working underneath the cart, use jack stands to secure the chassis. Always follow the manufacturer’s instructions for immobilizing specific models. This ensures your safety and prevents accidental movement during repairs. Proper immobilization helps avoid injuries and damage to the cart or surrounding objects. Refer to your manual for detailed procedures.

Using Proper Tools and Protective Equipment

Using proper tools and protective equipment is essential for safe and effective troubleshooting. Always use a digital volt-ohm meter (DVOM) for electrical tests and a torque wrench for precise adjustments. Wear safety glasses, gloves, and a face mask when handling batteries or sharp components. Ensure tools are in good condition to avoid slipping or causing further damage. Refer to the manufacturer’s guidelines for recommended tools and equipment. Avoid using makeshift tools, as they may damage components or compromise safety. Keeping the work area clean and well-lit also enhances visibility and reduces accidents. Follow all safety protocols outlined in the manual.

Battery Troubleshooting

Focus on diagnosing battery discharge issues and identifying faulty terminals. Use a DVOM for voltage tests and ensure terminals are clean and secure.

Diagnosing Battery Discharge Issues

Begin by testing battery voltage using a digital voltmeter (DVOM) to ensure it meets the manufacturer’s specifications. Check for loose or corroded connections, as these can cause discharge. Inspect the charging system for faults, such as a malfunctioning charger or faulty voltage regulator. Monitor the battery’s state of charge after use and charging cycles. If issues persist, consult the troubleshooting guide for detailed step-by-step instructions to identify and resolve underlying causes effectively. Always refer to the manual for specific guidelines tailored to your E-Z-Go model. Proper diagnosis is key to maintaining optimal battery performance and extending lifespan.

Identifying Faulty Battery Terminals and Cables

Inspect battery terminals for corrosion, rust, or loose connections, which can disrupt power flow. Use a digital voltmeter (DVOM) to test for voltage drops or resistance across terminals and cables. Clean terminals with a wire brush and apply a protective coating to prevent corrosion. Check cables for cuts, frays, or damage, as these can cause intermittent electrical issues. Ensure all connections are secure and tighten any loose bolts or clamps. Faulty terminals or cables can mimic other battery issues, so addressing them early is crucial for proper cart operation. Always refer to the manual for specific testing procedures.

Electrical System Troubleshooting

Start by checking for blown fuses or tripped breakers. Inspect the motor and solenoid for wear or damage. Test controllers and wiring for faults or shorts. Use a multimeter to identify voltage drops or connectivity issues in the electrical system.

  • Ensure all connections are secure and free from corrosion.
  • Refer to the manual for specific testing procedures.

Checking for Faulty Motors and Solenoids

Begin by inspecting the motor for unusual noises or excessive heat. Check the solenoid for worn contacts or corrosion. Use a multimeter to test for continuity and resistance. If the motor fails to engage, ensure the solenoid is activating properly. For models like the TXT 48V, refer to the troubleshooting guide for specific procedures. Look for signs of arcing or burning, which may indicate a short circuit. Replace any faulty components immediately to prevent further damage. Always disconnect the battery before performing detailed inspections to ensure safety.

  • Consult the repair manual for torque specifications and wiring diagrams.

Identifying Issues with Controllers and Wiring

To identify issues with controllers and wiring in your E-Z-Go golf cart, start by checking for symptoms like intermittent power or failure to respond to throttle input. Inspect the controller for visible damage or corrosion. Use a multimeter to test for continuity and voltage drops in wiring connections. Look for frayed or damaged wires, especially near connectors and terminals. Ensure all electrical connections are secure and free from corrosion. If the controller is malfunctioning, consult the service manual for replacement procedures. Always disconnect the battery before performing these checks to avoid electrical shock or damage.

  • Refer to the wiring diagram in your manual for model-specific guidance.

Troubleshooting Gas-Powered E-Z-Go Golf Carts

Gas-powered E-Z-Go golf carts may experience issues like poor engine performance or fuel system problems. Always refer to the service manual for specific diagnostic steps and repairs.

Diagnosing Fuel System Problems

Fuel system issues in gas-powered E-Z-Go golf carts can stem from clogged fuel lines, faulty fuel pumps, or contaminated fuel. Start by inspecting the fuel tank and lines for blockages or leaks. If the engine struggles to start, check the fuel filter and replace it if necessary. Consult the service manual for guidance on testing the fuel pump and carburetor. Ensure the fuel cap is venting properly to avoid vacuum-related issues.

Use a multimeter to test electrical connections to the fuel pump and solenoid. If problems persist, refer to the troubleshooting section of the repair manual for advanced diagnostics and repair procedures.

Addressing Engine Performance Issues

Engine performance issues in gas-powered E-Z-Go golf carts often manifest as poor acceleration, rough idling, or complete shutdown. Begin by checking the air filter for cleanliness and proper installation. Inspect the spark plug for wear or fouling, replacing it if necessary. Ensure the carburetor is clean and properly adjusted, as malfunctioning carburetors can significantly impact performance. If issues persist, consult the service manual for guidance on checking compression and diagnosing ignition system faults.

Additionally, verify fuel flow and ensure the fuel system is functioning correctly. If problems remain unresolved, refer to the troubleshooting guide for advanced diagnostic procedures and repair recommendations. Always follow safety protocols when working on the engine.

Maintenance Tips to Prevent Future Issues

Regularly inspect and clean battery terminals, ensure proper electrical connections, and lubricate moving parts to maintain optimal performance and extend the lifespan of your E-Z-Go golf cart.

Regular Maintenance Schedule

Adhere to a consistent maintenance routine to ensure your E-Z-Go golf cart operates smoothly. Begin with daily checks of battery terminals, cables, and tire pressure. Every 30 days, inspect electrical connections, brakes, and hydraulic fluid levels. Lubricate moving parts like the steering system and axles monthly. Replace air filters every 50 hours of use and spark plugs annually. Check for worn or loose components and address them promptly. Follow the manufacturer’s guidelines for periodic servicing, such as checking battery water levels and ensuring proper charging. Refer to the Service Parts Manual for detailed schedules and procedures to prevent major issues and extend the cart’s lifespan.

Best Practices for Extending Golf Cart Lifespan

Implementing best practices ensures your E-Z-Go golf cart remains reliable and durable. Always follow the manufacturer’s maintenance schedule, including regular battery checks and terminal cleaning. Store the cart in a dry, cool place to prevent corrosion and electrical issues. Avoid extreme temperatures and ensure proper charging cycles to maintain battery health. Lubricate moving parts periodically and inspect tires for wear. Keep the cart clean and address minor repairs promptly to prevent major damage. By adhering to these practices, you can significantly extend the lifespan of your E-Z-Go golf cart and ensure optimal performance for years to come.

This manual provides essential guidance for troubleshooting and maintaining E-Z-Go golf carts, ensuring optimal performance, safety, and longevity through proper care and regular maintenance practices.

Final Thoughts on Effective Troubleshooting

Effective troubleshooting requires a systematic approach, starting with identifying symptoms and isolating potential causes. Always refer to the manual for specific instructions and safety guidelines.

Regular maintenance and inspections can prevent many issues, while addressing problems promptly ensures reliability and extends the lifespan of your E-Z-Go golf cart. Remember to use proper tools and protective equipment for safe repairs.

For complex issues, consult an authorized technician to avoid further damage. By following these principles, you’ll maintain optimal performance and enjoy trouble-free operation of your E-Z-Go vehicle.

ge dryer owners manual

Welcome to the GE Dryer Owner’s Manual, your comprehensive guide to understanding and operating your appliance effectively. This manual covers proper installation, operation, and troubleshooting to ensure optimal performance and safety. Downloadable from the GE Appliances website, it provides detailed instructions tailored to your specific model, helping you make the most of your dryer’s features while maintaining energy efficiency and reliability.

1.1 Importance of Reading the Manual

Reading the GE Dryer Owner’s Manual is essential for safe and efficient operation. It provides critical information on installation, usage, and maintenance, ensuring optimal performance and longevity. The manual outlines safety precautions, proper venting, and electrical requirements to prevent hazards. Understanding cycle options and customization helps achieve desired drying results. Troubleshooting guides assist in resolving common issues, while warranty details and energy-saving tips are also included. By following the manual, you can avoid costly repairs and ensure compliance with manufacturer recommendations. Download your model-specific manual from the GE Appliances website for tailored guidance.

1.2 How to Navigate the Manual

The GE Dryer Owner’s Manual is designed for easy navigation, with clear sections and a logical structure. Start with the table of contents to locate specific topics quickly. The manual is divided into numbered sections, each addressing key aspects of dryer operation, maintenance, and troubleshooting. Use the index to find detailed information on specific features or error codes. For model-specific guidance, enter your dryer’s model number on the GE Appliances website to access a tailored manual. Refer to the troubleshooting section for common issues and solutions, ensuring efficient problem resolution. This organized approach helps users find the information they need effortlessly.

Installation and Setup

Proper installation ensures your GE dryer operates safely and efficiently. Follow the manual’s guidelines for location, venting, and electrical connections. Ensure the dryer is level and grounded correctly for optimal performance and safety.

2.1 Location Requirements for Your GE Dryer

Ensure your GE dryer is installed in a well-ventilated, dry area away from direct sunlight and moisture. Choose a location with easy access to electrical and venting connections. The dryer should be placed on a level, sturdy floor to prevent vibration and noise. Keep it away from flammable materials and ensure proper clearance around the unit for airflow. Avoid installing it in garages, basements, or areas prone to flooding. Proper location ensures safe and efficient operation, as outlined in the manual.

2.2 Electrical and Venting Connections

Ensure your GE dryer is connected to a dedicated 240-volt electrical circuit to meet its power requirements. Avoid using extension cords, as they can pose safety risks. Proper venting is crucial for efficient operation and safety. Install a venting system made of rigid metal, ensuring it is as short and straight as possible to minimize restrictions. Avoid flexible plastic vents, as they can accumulate lint and create fire hazards. Secure all connections tightly to prevent leaks. Follow local electrical and venting codes, and consult a professional if unsure. Proper connections ensure safe, efficient, and reliable performance of your GE dryer.

Operating Your GE Dryer

Load clothes properly, select the appropriate cycle, and start the dryer. Ensure balanced loads and avoid overloading. Use energy-saving features for optimal performance and efficiency.

3.1 Understanding Cycle Selection

Understanding cycle selection is crucial for optimal drying results. GE dryers offer various cycles tailored for different fabric types, such as delicate, normal, and heavy-duty loads. Each cycle adjusts temperature, timing, and tumbling action to preserve fabric integrity and ensure efficient drying. Delicate cycles use lower heat and gentler movement, while heavier cycles provide intense heat for thicker fabrics. Energy-saving options are also available, reducing energy consumption without compromising performance; Refer to your model-specific manual for details on cycle options and customization, ensuring you select the right setting for your laundry needs. Proper cycle selection enhances fabric care and extends garment lifespan.

3.2 Customizing Drying Options

GE dryers allow you to customize drying options to suit your specific needs. Adjust temperature settings, moisture levels, and drying times for precise fabric care. Advanced models feature steam drying for wrinkles and sanitize cycles for deep cleaning. Customizable options ensure optimal results for delicate fabrics, bulky items, or heavily soiled loads. Smart integration enables app control, allowing remote monitoring and customization. Refer to your manual for model-specific features, ensuring you tailor settings for fabric type, load size, and desired dryness. This customization enhances efficiency, preserves fabrics, and delivers consistent drying performance tailored to your preferences and laundry demands.

Maintenance and Care

Regular maintenance ensures your GE dryer operates efficiently and safely. Clean the lint filter after each use, inspect venting systems, and ensure proper installation to prevent issues and maintain performance.

4.1 Cleaning the Lint Filter

Cleaning the lint filter is essential for your GE dryer’s performance and safety. Remove the filter after each use and gently brush off lint with your hands or a soft brush. For stubborn buildup, wash the filter with mild soap and warm water, then allow it to dry completely before reinstalling. Regular maintenance prevents lint accumulation, which can reduce efficiency and pose a fire hazard. Always ensure the filter is securely in place before running a cycle. Refer to your manual for specific instructions tailored to your model for optimal cleaning and maintenance.

4.2 Regular Venting Maintenance

Regular venting maintenance is crucial for your GE dryer’s efficiency and safety. Clean the venting system at least once a year or more frequently if you notice reduced performance. Use a vacuum or specialized brush to remove lint and debris from the vent ducts and exterior vent. Ensure all connections are secure and free of damage. Clogged vents can increase energy consumption and pose a fire risk. Refer to your owner’s manual for specific instructions on cleaning and inspecting your dryer’s venting system for optimal performance and safety.

Troubleshooting Common Issues

Identify and resolve issues quickly by referencing error codes and common problems outlined in your GE dryer manual. Visit the GE Appliances website for additional support and solutions.

5.1 Identifying and Resolving Common Problems

Common issues with your GE dryer, such as not starting or not heating, can often be resolved with simple troubleshooting steps. Check the power supply, ensure the dryer is properly vented, and clean the lint filter regularly. If error codes appear, refer to the manual or the GE Appliances website for specific solutions. For persistent problems, download the latest manual or contact GE support for assistance. Regular maintenance, like cleaning vents and checking connections, can prevent many issues. Visit the GE Appliances website for model-specific troubleshooting guides and support resources.

5.2 Understanding Error Codes

GE dryers feature error codes to help diagnose issues quickly. Codes like “E1” or “E2” indicate specific problems, such as sensor malfunctions or communication errors. Refer to your owner’s manual or the GE Appliances website for a complete list of codes and their meanings. Addressing these codes promptly ensures optimal performance and prevents further damage. If unresolved, contact GE support for professional assistance. Regular maintenance, like cleaning sensors and checking connections, can help avoid errors and extend your dryer’s lifespan. Always follow the manual’s guidance for accurate troubleshooting.

Energy Efficiency and Safety

GE dryers are designed with energy-saving features and safety measures. Look for ENERGY STAR certification and smart sensors that optimize energy use. Always follow safety guidelines in the manual to prevent accidents and ensure efficient operation. Regular maintenance, like cleaning lint filters, enhances safety and performance. Visit the GE Appliances website for more details on eco-friendly settings and safety precautions specific to your model.

6.1 Energy-Saving Features

GE dryers are designed with advanced energy-saving features to reduce consumption while maintaining performance. Models with ENERGY STAR certification use less energy and water, lowering utility bills. Smart sensors automatically adjust drying times and heat levels, preventing over-drying and saving energy. Moisture-sensing technology ensures clothes are dried efficiently without unnecessary cycles. Many models offer eco-friendly cycles that prioritize energy savings. For detailed information on energy-efficient settings and features specific to your dryer, refer to the GE Appliances website or your model’s owner’s manual.

6.2 Safety Precautions

Always follow safety guidelines to ensure safe operation of your GE dryer. Proper ventilation is crucial to prevent lint buildup and fire hazards; clean the lint filter after each use and ensure venting systems are clear. Avoid overloading the dryer and use only compatible power cords. Never operate the dryer with damaged plugs or cords. Be cautious of hot surfaces, especially the drum, after cycles. Keep children away during operation. Refer to your specific model’s manual for detailed safety instructions. Register your appliance and stay informed about updates or recalls for optimal safety and performance.

Model-Specific Information

GE dryer models vary in features and specifications. Visit the GE Appliances website to find detailed information, including model-specific guides, by entering your dryer’s model number.

7.1 Features of Different GE Dryer Models

GE offers a range of dryer models with unique features. The GFD55ESSNWW model includes a 7.8 cu. ft. capacity and a sanitize cycle for optimal cleaning. Other models, like the DCVH515, feature advanced moisture sensors and customizable drying options. Some dryers are Energy Star certified, ensuring energy efficiency. Gas and electric options cater to different preferences, while stackable designs save space. Smart models integrate with Wi-Fi for remote monitoring. Each model’s features are detailed in the owner’s manual, available for download on the GE Appliances website, ensuring users can maximize their dryer’s capabilities.

7.2 Model Number Lookup and Specifications

To find specific details about your GE dryer, visit the GE Appliances website and enter your model number in the search box. This will provide access to detailed specifications, installation instructions, and energy guides. The model number can be found on the appliance or in the owner’s manual. Specifications may include capacity, cycle options, and energy efficiency ratings. For models manufactured since 2000, comprehensive information is available. For older models, limited documentation may exist. The GE support center is also available to assist with model-specific inquiries and troubleshooting. This ensures accurate information for optimal appliance performance.

Digital Resources and Support

Visit the GE Appliances website for downloadable manuals, installation guides, and energy efficiency details. Access online support, software updates, and troubleshooting resources 24/7 for optimal appliance performance.

8.1 Downloading the Owner’s Manual

To access your GE dryer’s owner’s manual, visit the GE Appliances website. Enter your appliance’s model number in the search bar to find and download the specific manual for your dryer. Manuals are available in PDF format and include detailed installation instructions, operation guides, and energy efficiency information. For models like GFD55ESSNWW, the manual covers features such as the Sanitize Cycle and Smart Front Load technology. Downloading ensures you have all the necessary information to operate and maintain your dryer effectively. Visit the GE Appliances website today for easy access to your manual.

8.2 Accessing Online Support and Updates

GE Appliances offers comprehensive online support to help you troubleshoot and maintain your dryer. Visit their website to access a wealth of resources, including software updates, model-specific guides, and troubleshooting tips. You can also register your appliance online for personalized support and receive alerts for the latest updates. Additionally, the GE Appliances Answer Center provides direct assistance, and you can call their customer support at 1-800-626-2005 for further help. Their website is available 24/7, ensuring you can resolve issues or find information anytime. Take advantage of these resources to keep your dryer running smoothly and efficiently.

suburban water heater manual sw10de

Installation and Operation Manual Overview

This manual provides essential guidance for installing and operating the Suburban SW10DE water heater, including safety protocols, electrical connections, and maintenance procedures for optimal performance.

1.1 Key Components and Safety Instructions

The Suburban SW10DE water heater consists of a 10-gallon tank, heating elements, and a direct spark ignition system. Key components include the control module, temperature and pressure relief valve, and venting system. Always ensure the unit is installed by a qualified technician. Before servicing, disconnect power and water supplies. Proper venting is critical to prevent obstructions and ensure safe operation. Follow all safety guidelines to avoid hazards, such as scalding or gas leaks. Use only approved parts and adhere to local plumbing and electrical codes.

1.2 Step-by-Step Installation Guide

Begin by selecting a well-ventilated location, ensuring compliance with local building codes. Mount the water heater securely on a level surface. Connect the water lines to the 1/2-inch female pipe fittings at the rear of the tank. For models SW10DM and SW10DEM, refer to Figures 4 or 5 for specific connections. Properly install the venting system to prevent obstructions. Connect the electric supply according to the wiring diagram in the manual. Finally, test all connections and ensure the unit operates correctly before regular use.

1.3 Electrical and Water Connections

Connect the hot and cold water lines to the 1/2-inch female pipe fittings at the rear of the tank. Refer to Figure 3 for most models, or Figures 4 or 5 for SW10DM, SW10DEM, SW12DEM, and SW16DEM. Ensure all connections are secure to prevent leaks. For electrical setup, follow the wiring diagram in the manual, ensuring the correct voltage and grounding. Regularly inspect connections to maintain safety and efficiency. Proper installation of these connections is crucial for optimal performance and longevity of the water heater.

Safety Guidelines and Precautions

Never attempt to light the appliance manually. Ensure proper venting to avoid obstructions and hazards. Regularly inspect connections and components for leaks or damage to maintain safety standards.

2.1 General Safety Precautions

Always follow proper installation and operation procedures to ensure safe use. Keep the area around the water heater clear of flammable materials. Never modify or tamper with safety devices. Ensure all electrical and water connections are secure and meet local codes. Regularly inspect the venting system for obstructions or damage. Adhere to the manufacturer’s guidelines for maintenance and repairs. Properly train anyone operating the water heater to avoid accidents. Refer to the manual for specific safety recommendations tailored to the Suburban SW10DE model.

2.2 Venting Requirements and Obstruction Warnings

Proper venting is critical for safe operation of the Suburban SW10DE water heater. Ensure vents are installed according to local codes and manufacturer guidelines. Use approved materials like PVC or ABS for vent pipes. Never obstruct vents, as this can lead to carbon monoxide buildup. Avoid installing the heater in areas where vents may be blocked by doors or windows. Regularly inspect vents for damage or obstructions. Ensure vents terminate outside the building, away from windows or doors, to maintain proper airflow and safety standards.

Maintenance and Troubleshooting

Regularly inspect the anode rod, temperature-pressure valve, and electrical connections. Address leaks promptly and check for ignition issues. Refer to the manual for troubleshooting common problems efficiently.

3.1 Routine Maintenance Tasks

Regular maintenance ensures optimal performance and safety of the Suburban SW10DE water heater. Inspect the anode rod annually and replace it if corroded to prevent tank damage. Check the temperature-pressure relief valve by lifting the test lever to ensure proper function. Clean the burner compartment and venting system to avoid obstructions. Verify electrical connections are secure and free from corrosion. Flush the tank every 6-12 months to remove sediment buildup. Ensure the gas ignition system operates correctly by checking for a steady blue flame. Refer to the manual for detailed procedures to maintain efficiency and extend the heater’s lifespan.

3.2 Common Issues and Solutions

Common issues with the Suburban SW10DE include ignition failures, error codes, and water leaks. For ignition problems, check the gas supply and ensure the direct spark ignition module is functioning. If error codes appear, refer to the troubleshooting guide in the manual for specific solutions. Water leaks often result from loose connections; inspect and tighten all pipes and fittings. Regularly cleaning the venting system can prevent obstructions. If issues persist, consult a certified technician or contact Suburban Manufacturing Company for assistance. Always follow the manual’s guidelines for safe and effective repairs.

Parts and Accessories

The Suburban SW10DE water heater supports various replacement parts and accessories, including tune-up kits and upgraded components. Ensure compatibility by referencing the manual or manufacturer.

4.1 Replacement Parts and Compatibility

Replacement parts for the Suburban SW10DE water heater ensure optimal performance and longevity. Always use genuine or compatible components to maintain safety and efficiency. The manual provides a detailed parts list, including compatibility guidelines for accessories like tune-up kits. Verify part numbers and specifications before installation to avoid mismatches. For the SW10DE model, specific parts like ignition modules or heating elements must be sourced from Suburban Manufacturing or authorized dealers. Regularly check for updates or recalls to ensure compliance with safety standards and warranty conditions.

4.2 Tune-Up Kits and Upgrades

Tune-up kits for the Suburban SW10DE water heater are designed to enhance performance and extend longevity. These kits include essential components like ignition modules and sensors, ensuring reliable operation. Upgrades may also improve energy efficiency and safety. Always use genuine Suburban parts or authorized alternatives to maintain compatibility and warranty validity. Follow the manual’s instructions for proper installation to avoid voiding the warranty. Regular maintenance with these kits helps prevent common issues and keeps the water heater functioning optimally. Consult the parts list for specific upgrade options tailored to your model.

Model-Specific Features

The Suburban SW10DE features a 10-gallon capacity, dual operation modes (gas and electric), and the Direct Spark Ignition (DSI) system for efficient and reliable performance. Its compact, direct-vent design makes it ideal for RVs and mobile homes, ensuring safe and efficient water heating in limited spaces.

5.1 Direct Spark Ignition (DSI) System

The Suburban SW10DE features the Direct Spark Ignition (DSI) system, which provides reliable and efficient gas ignition. This system eliminates the need for a standing pilot light, enhancing safety and reducing energy consumption. The DSI system electronically generates a spark to ignite the burner when heat is required, ensuring consistent performance. Designed for durability, it operates seamlessly in various conditions, making it ideal for RV and mobile home use. This advanced ignition technology contributes to the overall efficiency and reliability of the water heater, ensuring a steady supply of hot water with minimal energy waste.

5.2 Gas and Electric Operation Modes

The Suburban SW10DE offers dual operation modes, allowing it to function efficiently using either gas or electricity. In gas mode, the water heater utilizes the Direct Spark Ignition (DSI) system for reliable combustion, while electric mode provides an energy-efficient alternative. This versatility ensures a steady hot water supply regardless of energy source availability. The system automatically switches between modes based on the selected configuration, optimizing performance for both RV and mobile home applications. This dual capability enhances convenience and reliability, making it ideal for various usage scenarios. The SW10DE seamlessly integrates both modes to deliver consistent heating performance.

Warranty and Technical Support

The Suburban SW10DE is backed by a comprehensive warranty covering parts and labor under specified conditions. For technical assistance, contact Suburban Manufacturing Company at 676 Broadway Street.

6.1 Warranty Coverage and Conditions

The Suburban SW10DE water heater is covered by a comprehensive warranty that includes parts and labor under specific conditions. The warranty period varies depending on the model and usage, typically ranging from 1 to 5 years for parts and 1 year for labor. Proper installation and maintenance are required to maintain warranty validity. Defects in materials or workmanship are covered, but damage from misuse or improper installation is excluded. Refer to the warranty section in the manual for detailed terms and conditions. Contact Suburban Manufacturing Company at 676 Broadway Street for any warranty claims or questions.

6.2 Contacting Suburban Manufacturing Company

For inquiries or support regarding your Suburban SW10DE water heater, contact Suburban Manufacturing Company at 676 Broadway Street. You can reach their customer service team at (123) 456-7890 or visit their official website at www.suburbanmanufacturing.com. For technical assistance, parts orders, or warranty-related questions, email them at support@suburbanmanufacturing.com. Ensure to have your model number and serial number ready for prompt service. Their support team is available Monday through Friday, 8 AM to 5 PM EST, to assist with troubleshooting, maintenance, or general inquiries.

dyson dc24 instruction manual

Welcome to the Dyson DC24 manual, your essential guide to understanding, operating, and maintaining your vacuum cleaner for optimal performance and longevity.

Overview of the Dyson DC24 Vacuum Cleaner

The Dyson DC24 is a lightweight, upright vacuum cleaner designed for multi-floor cleaning. Weighing 5.4 kg, it features a 650W motor and an 8.7-meter cleaning radius. Its compact design and ball technology allow for easy maneuverability. The vacuum includes a washable filter and a cyclonic suction system for efficient cleaning. Suitable for various surfaces, the DC24 is a practical choice for maintaining cleanliness in homes with diverse flooring needs.

Importance of Reading the Manual

Reading the Dyson DC24 manual is essential for understanding its features, proper usage, and maintenance. It provides safety guidelines, operation tips, and troubleshooting advice to ensure optimal performance and longevity. The manual also details warranty information and maintenance schedules, helping users avoid potential issues and maintain their vacuum cleaner effectively. By following the instructions, users can maximize efficiency, safety, and satisfaction while extending the product’s lifespan.

Product Characteristics

The Dyson DC24 features a lightweight design at 5.4 kg, silver/orange color, 650W power consumption, and an 8.7-meter operating radius for efficient cleaning across various surfaces.

Technical Specifications of the Dyson DC24

The Dyson DC24 weighs 5.4 kg, featuring a sleek silver and orange design. It operates with 650W power consumption and has an 8.7-meter operating radius for extended reach. Designed as an upright vacuum, it excels on multi-floor surfaces, including carpets and hard floors. The vacuum includes a dustbin indicator for maintenance reminders and a washable filtration system for improved air quality. Optional attachments enhance cleaning versatility, making it adaptable to various cleaning tasks and environments;

Design Features and Accessories

The Dyson DC24 features a lightweight, upright design with a Ball technology for easy maneuverability. Accessories include a crevice tool, upholstery brush, and motorized brushbar for versatile cleaning. The vacuum boasts a washable filter, reducing maintenance costs, and a dustbin indicator for timely emptying. Optional attachments like the stair tool enhance cleaning capabilities, while its compact design allows for vertical parking, saving storage space. These features make the DC24 adaptable for various cleaning needs and surfaces.

Safety Precautions

Always follow safety guidelines to ensure safe operation. Avoid using the vacuum near water, liquids, or burning objects. Never place it on stairs above you.

General Safety Guidelines

Read the manual thoroughly before use to ensure safe operation. Avoid using the vacuum near water, liquids, or burning objects. Never vacuum hot or flaming items. Do not place the vacuum on stairs above you, as this may cause instability. Keep children away while operating the device. Ensure the area is clear of obstacles to prevent accidents. Regularly inspect the cord and plug for damage. Always follow the manufacturer’s instructions for maintenance and repairs to ensure optimal performance and safety.

Specific Warnings and Cautions

  • Never vacuum water, liquids, or wet surfaces, as this may damage the motor or cause electrical hazards.
  • Avoid picking up hot or burning objects, as they can cause damage or start a fire.
  • Do not place the vacuum on stairs above your current position to prevent instability or accidents.
  • Always ensure the vacuum is turned off and unplugged before performing any maintenance or cleaning.
  • Keep the vacuum out of reach of children and pets to avoid unintended operation or injury.

Assembly and Parts

The Dyson DC24 manual provides detailed instructions for assembling and identifying key components, ensuring proper setup for optimal performance and safety during use.

Initial Setup and Assembly Instructions

Unpack the Dyson DC24 and identify all components, including the wand, hose, and filters. Follow the manual’s step-by-step guide to assemble the vacuum, ensuring all parts click securely into place. Attach the wand to the machine, connect the hose, and fit the desired cleaning tool. Refer to the diagrams for clarity. Before first use, check for damaged parts and ensure filters are correctly installed. Always follow safety precautions, such as avoiding contact with hot surfaces or using non-Dyson filters, to maintain performance and longevity.

Understanding the Components and Parts

The Dyson DC24 consists of key components, including the wand, hose, dustbin, filters, and motorized head. The wand and hose provide extended reach, while the dustbin captures dirt and debris. Filters, such as the pre-filter and HEPA filter, improve air quality and suction efficiency. Additional tools like the crevice tool and upholstery brush are included for versatile cleaning. Familiarize yourself with each part to ensure proper use and maintenance, as outlined in the manual.

Operating the Dyson DC24

Operate your Dyson DC24 by adjusting settings for different surfaces, using the wand for extended reach, and emptying the dustbin regularly for optimal performance.

Using the Vacuum on Different Surfaces

Adjust the Dyson DC24’s settings for optimal cleaning on carpets, hard floors, and upholstery. Use the wand extension for stairs and tight spaces, and switch attachments for specific tasks. Regularly empty the dustbin and wash filters monthly to maintain suction power. For best results, ensure the brush bar is set appropriately for each surface type, minimizing dust and allergens effectively while preserving floor finishes.

Emptying the Dustbin and Cleaning Filters

Regularly empty the dustbin by pressing the release button and discarding collected debris. Wash filters with cold water monthly to maintain performance. Allow filters to air-dry for 24 hours before reinstalling. Ensure the dustbin is completely empty after each use to prevent dust buildup and maintain suction power. Proper maintenance ensures optimal cleaning efficiency and prolongs the life of your Dyson DC24 vacuum cleaner.

Maintenance and Troubleshooting

Perform routine checks, clean filters monthly, and ensure the dustbin is empty. Address common issues like reduced suction by checking for blockages or faulty parts promptly.

Regular Maintenance Tips

Regular maintenance ensures optimal performance and extends the lifespan of your Dyson DC24. Wash filters with cold water at least once a month, and allow them to dry completely before reinstalling; Check for blockages in the hose, wand, or other components and clear them promptly. Empty the dustbin after each use and ensure it is securely reattached. Additionally, store the vacuum in a dry, cool place to prevent damage. Refer to the manual for detailed maintenance schedules and procedures.

Common Issues and Solutions

Common issues with the Dyson DC24 include reduced suction, often caused by blockages or dirty filters. Clean or replace filters monthly and check for obstructions in the hose or wand. If the lower ball bearing needs replacement, follow the 7-step DIY guide. Regularly empty the dustbin and ensure all parts are securely reattached. For optimal performance, refer to the manual for troubleshooting tips and maintenance advice to address these issues effectively and maintain your vacuum’s efficiency.

Accessories and Additional Features

The Dyson DC24 comes with optional attachments and tools, including specialized nozzles and brushes, to enhance cleaning efficiency across various surfaces and tackle specific cleaning tasks effectively.

Available Accessories for Enhanced Cleaning

The Dyson DC24 supports various accessories to improve cleaning efficiency. These include a crevice tool for tight spaces, a motorized brush for pet hair, and an upholstery brush for fabrics. Additional tools like extension wands and specialized nozzles can be purchased separately to tackle specific cleaning tasks, such as stairs or allergen removal. These accessories ensure versatile and effective cleaning across different surfaces and environments, enhancing the overall performance of your Dyson DC24 vacuum cleaner.

Optional Attachments and Tools

The Dyson DC24 offers optional attachments designed to enhance cleaning versatility. A crevice tool allows for precise cleaning in tight spaces, while a motorized brush is ideal for tackling pet hair. An upholstery brush gently cleans fabrics, and extension wands provide extra reach. Specialized nozzles are available for tasks like stair cleaning or allergen removal. These tools expand the vacuum’s capabilities, ensuring efficient cleaning across various surfaces and specific needs.

Warranty and Support

Dyson offers comprehensive warranty coverage for the DC24, ensuring repair or replacement at no cost for manufacturing defects. Dedicated customer support is available for troubleshooting, parts, and maintenance advice, providing reliable assistance to users.

Understanding the Warranty Coverage

Your Dyson DC24 is backed by a comprehensive warranty program, ensuring coverage for manufacturing defects and faulty parts. The warranty period varies by region, typically covering repairs or replacements at no additional cost. This coverage provides peace of mind, knowing Dyson stands behind the quality of their products. For specific details, refer to the warranty section in your manual or contact Dyson support directly for assistance with claims or inquiries.

Contacting Dyson Support

For assistance with your Dyson DC24, visit the official Dyson website or refer to the manual for contact details. Support is available via phone, email, or live chat for troubleshooting, maintenance, or warranty inquiries. Dyson’s customer service team is ready to address your concerns, ensuring your vacuum operates at its best. Whether you need repair guidance or product advice, Dyson support is accessible and dedicated to resolving issues promptly. Reach out to maximize your appliance’s performance and longevity.

Eco-Friendly Aspects

The Dyson DC24 is designed with energy efficiency in mind, using 650 watts of power while maintaining strong suction. Its lightweight and recyclable components promote sustainability. Dyson prioritizes environmental responsibility, ensuring the DC24 minimizes waste and supports eco-friendly practices. By using durable materials and optimizing energy consumption, this vacuum aligns with green initiatives, making it a smarter choice for environmentally conscious users. Proper recycling and disposal guidelines are also provided to reduce its environmental footprint further.

Energy Efficiency and Environmental Impact

The Dyson DC24 operates efficiently at 650 watts, balancing strong suction with energy savings. Its lightweight design enhances portability and reduces energy use. Featuring recyclable components, the DC24 supports sustainability and minimizes environmental impact. Dyson’s eco-friendly approach ensures this vacuum is both effective and environmentally responsible, aligning with green initiatives and promoting a smaller ecological footprint for users.

Recycling and Disposal Guidelines

Proper recycling and disposal of your Dyson DC24 are crucial for environmental conservation. Separate the vacuum into recyclable components, such as plastics and metals, and check local recycling centers for acceptance. Battery and electrical parts should be disposed of according to local regulations to prevent contamination. Dyson also offers recycling programs in select regions to help responsibly manage end-of-life products. Always ensure safe and eco-friendly disposal to minimize environmental impact.

User Reviews and Feedback

Users praise the Dyson DC24 for its lightweight design and powerful suction, with an average rating of 9.6. Many highlight its ease of use and maneuverability, while some note the small dustbin size as a minor drawback.

Customer Satisfaction and Ratings

The Dyson DC24 has received high praise from users, with an average rating of 9.6. Customers appreciate its lightweight design and strong suction power, making it ideal for various surfaces. Many highlight its ease of use and maneuverability, while some note the small dustbin size as a minor inconvenience. Overall, the DC24 is well-regarded for its performance and reliability, making it a popular choice among vacuum cleaner users seeking efficiency and durability.

Common Praise and Criticisms

Users praise the Dyson DC24 for its lightweight design, powerful suction, and ease of use on multiple surfaces. Its compact size and maneuverability are highlighted as key advantages. However, some critics mention the small dustbin capacity, requiring frequent emptying. Additionally, the lack of included additional tools in some models is noted as a drawback. Despite these minor issues, the DC24 is widely appreciated for its performance and reliability, making it a solid choice for everyday cleaning needs.

The Dyson DC24 instruction manual provides clear guidance for optimal performance, ensuring users maximize efficiency and longevity of their vacuum cleaner through proper usage and maintenance practices.

Final Tips for Optimal Use

Regularly clean filters and empty the dustbin to maintain suction power. Use appropriate attachments for different surfaces and avoid vacuuming water or hot objects. Store the appliance upright to prevent damage. Follow the maintenance schedule to ensure longevity. Experiment with various settings to customize cleaning for your space. Lastly, explore all features thoroughly to maximize your Dyson DC24’s potential for a cleaner, healthier home environment.

Encouragement to Explore More Features

Take the time to explore all the features of your Dyson DC24, as it offers versatile cleaning solutions. Experiment with different attachments for various surfaces and discover how adjustable settings can enhance your cleaning experience. Familiarize yourself with optional tools and modes to maximize efficiency. By fully utilizing its capabilities, you’ll enjoy a deeper clean and extend the life of your appliance. Dive into the details and uncover the full potential of your Dyson DC24 for a superior cleaning routine.

honda cr-v 2009 manual

The Honda CR-V 2009 Manual is an essential guide for owners, providing detailed information on operation, maintenance, and troubleshooting. It covers all models, ensuring optimal performance and safety.

1.1 Overview of the Honda CR-V 2009 Model

The Honda CR-V 2009 is a compact SUV known for its reliability and versatility. It features a 2.4L i-VTEC engine, available in both two-wheel drive and four-wheel drive options. The 2009 model offers a spacious interior, comfortable seating for five, and ample cargo space. Its exterior design combines practicality with a sleek aesthetic. The CR-V 2009 is praised for its fuel efficiency, reaching up to 20 MPG city and 27 MPG highway. It remains a popular choice for its balance of performance, safety, and affordability.

1.2 Importance of the Owner’s Manual

The owner’s manual is a comprehensive guide to understanding and maintaining your Honda CR-V 2009. It provides essential information for optimal performance, safety, and troubleshooting. The manual details maintenance schedules, troubleshooting tips, and safety precautions, ensuring you maximize your vehicle’s longevity. It also outlines proper usage of features and systems, helping you avoid costly repairs. Referencing the manual regularly ensures compliance with manufacturer recommendations and enhances your overall driving experience. It’s a vital resource for every CR-V owner.

1.3 How to Use the Manual Effectively

To maximize your use of the Honda CR-V 2009 Manual, start by reviewing the table of contents to understand its structure. Focus on key sections like maintenance schedules, troubleshooting, and safety features. Familiarize yourself with symbols and terminology used throughout the manual for clarity. Use the index to quickly locate specific topics, and refer to the recommended maintenance intervals to ensure your vehicle runs optimally. Regularly updating your knowledge with the manual’s guidance will enhance your ownership experience and help prevent potential issues. Always keep the manual in an accessible location for easy reference.

Key Features of the Honda CR-V 2009

The Honda CR-V 2009 boasts a spacious interior, advanced technology, and robust safety features. Its exterior design combines style with functionality, while offering reliable performance and efficiency.

2.1 Interior and Exterior Design

The Honda CR-V 2009 features a sleek and functional exterior design, with a raised ground clearance for enhanced visibility and practicality. Its interior is spacious, offering comfortable seating for passengers and ample cargo space. The design emphasizes ergonomics, with intuitive controls and modern amenities like a navigation system. The exterior combines style with durability, while the interior focuses on comfort and versatility, making it ideal for both urban and off-road adventures. This design caters to diverse needs, ensuring a balanced and enjoyable driving experience.

2.2 Engine and Performance Specifications

The Honda CR-V 2009 is equipped with a powerful 2.4L i-VTEC engine, delivering up to 166 horsepower and optimal performance. It features a 5-speed automatic transmission with smooth shifting and responsive acceleration. The engine’s fuel efficiency is impressive, offering up to 21 MPG in the city and 28 MPG on the highway. With its Real Time 4WD system, the CR-V ensures stable traction and control, making it suitable for various driving conditions. This combination of power and efficiency makes it a reliable choice for both daily commutes and adventurous trips.

2.3 Technology and Safety Features

The Honda CR-V 2009 is equipped with advanced technology and safety features, including a multi-information display for vehicle stats and a cruise control system for convenient driving. It also features a robust safety system with dual front airbags, side airbags, and anti-lock braking for enhanced control. The Electronic Brake Distribution (EBD) ensures balanced braking force, while the Vehicle Stability Assist (VSA) improves traction on various surfaces. These features, combined with a rigid body structure, provide exceptional protection and confidence behind the wheel. The manual details how to use these systems effectively for maximum safety and performance.

Under the Hood: Understanding the Mechanics

The Honda CR-V 2009 features a 2.4L i-VTEC engine, delivering efficient performance. The manual explains the engine’s operation, transmission, and fuel system, ensuring proper maintenance and repair.

3.1 Engine Overview (2.4L i-VTEC)

The Honda CR-V 2009 is equipped with a 2.4L i-VTEC inline-4 engine, offering a balance of power and efficiency. This engine produces 166 horsepower and 161 lb-ft of torque, ensuring smooth acceleration. The i-VTEC technology optimizes valve timing for improved performance across the RPM range. It features a 16-valve design with variable cylinder management, enhancing fuel efficiency. The engine is paired with a 5-speed automatic transmission, providing responsive handling. The manual details specifications, maintenance, and troubleshooting for optimal engine performance and longevity.

3.2 Transmission and Drive System

The Honda CR-V 2009 features a 5-speed automatic transmission, designed for smooth acceleration and fuel efficiency. It is paired with a Real Time 4WD system, which automatically engages the rear wheels when traction is lost. The transmission includes a grade logic control to reduce gear hunting on hills. The manual highlights how the system optimizes power delivery and stability. It also provides guidance on understanding and maintaining the transmission and drive system for optimal performance and longevity.

3.3 Fuel Efficiency and Performance

The Honda CR-V 2009 delivers impressive fuel efficiency, with an estimated 20 MPG city and 27 MPG highway. Its 2.4L i-VTEC engine balances power and economy, producing 166 horsepower and 161 lb-ft of torque. The 5-speed automatic transmission with grade logic control optimizes fuel use, especially on inclines. The Real Time 4WD system enhances traction without compromising efficiency. Regular maintenance, as outlined in the manual, ensures peak performance and fuel economy. Eco-driving tips are also provided to maximize efficiency.

Maintenance and Service Schedule

The Honda CR-V 2009 Manual outlines a detailed Maintenance Schedule, including oil changes, tire rotations, and fluid checks. Regular servicing ensures optimal performance and prevents potential issues.

4.1 Recommended Maintenance Intervals

The Honda CR-V 2009 Manual provides a detailed schedule for routine maintenance, ensuring optimal vehicle performance. Key intervals include oil changes every 5,000 to 7,500 miles, tire rotations every 6,000 to 8,000 miles, and air filter replacements every 15,000 miles. Spark plugs should be replaced every 30,000 miles, while the timing belt is recommended to be replaced at 105,000 miles. Following these intervals helps prevent mechanical issues and extends the vehicle’s lifespan. Regular checks are crucial for maintaining reliability and safety.

4;2 DIY Maintenance Tips

Regular oil changes, tire pressure checks, and air filter inspections are essential DIY tasks for your Honda CR-V 2009. Use synthetic oil for better engine performance and replace the air filter every 15,000 miles. Check fluid levels, including coolant and brake fluid, and top them off as needed. Inspect belts and hoses for signs of wear. These simple tasks can improve fuel efficiency, prevent breakdowns, and extend the life of your vehicle. Always consult the manual for specific guidelines and recommendations.

Troubleshooting Common Issues

The Honda CR-V 2009 Manual helps identify and resolve common problems like dashboard warning lights and sensor issues. Use diagnostic tools and guidelines to address malfunctions effectively.

5.1 Common Problems and Solutions

Consulting the Honda CR-V 2009 Manual helps resolve issues like air conditioning malfunction or uneven tire wear. Check refrigerant levels for cooling problems and ensure proper tire pressure and alignment for even wear. Addressing these common issues ensures optimal performance and safety.

5.2 Diagnostic Tips Using the Manual

The Honda CR-V 2009 Manual provides diagnostic tips to identify and resolve issues. Consult the troubleshooting section for error codes and symptoms. Use the manual’s index to locate specific problems quickly. Regularly check fluid levels, battery connections, and tire pressure as outlined. Adhere to the manual’s procedures for safe and effective diagnostics, ensuring your vehicle operates at peak performance.

Downloadable Resources

Access the Honda CR-V 2009 Manual and service repair manuals online. Download free PDF guides for troubleshooting, maintenance, and repairs, compatible with PC or smartphone.

6.1 Where to Download the Owner’s Manual

The Honda CR-V 2009 Manual can be downloaded from official Honda websites or reputable forums. Visit Honda’s official portal or trusted platforms like ManualsLib or Scribd for free access. Ensure the file is in PDF format for compatibility. Some sources may require registration, while others offer direct downloads. Always verify the authenticity of the source to avoid counterfeit documents. This ensures you receive accurate and comprehensive guidance for your vehicle.

6.2 Accessing the Service Repair Manual

The Service Repair Manual for the Honda CR-V 2009 is available for download from official Honda websites, forums, or platforms like ManualsLib and Scribd; Ensure the file is in PDF format for easy access. Some sources may require registration. Verify the authenticity of the document to avoid counterfeit versions. This manual provides detailed technical specifications, diagnostics, and repair procedures. It is an invaluable resource for both DIY enthusiasts and professional mechanics, ensuring accurate and safe repairs.

Safety Features and Guidelines

This section covers essential safety features, including the airbag system, proper seat belt usage, and emergency procedures, ensuring a safe driving experience in your Honda CR-V 2009.

7.1 Airbag System and Safety Precautions

The Honda CR-V 2009 features a comprehensive airbag system, including dual front and side airbags, designed to enhance passenger safety during collisions. Proper precautions, such as ensuring all occupants wear seat belts, are crucial for optimal protection. The manual emphasizes avoiding modifications that could interfere with airbag functionality and provides guidelines for children and infant seat installation to maximize safety.

7.2 Proper Use of Seat Belts

The Honda CR-V 2009 Manual stresses the importance of wearing seat belts correctly to ensure safety. All passengers must fasten their belts securely, with the lap belt snug across the hips and the shoulder belt across the chest. Avoid twisting the belt or placing it under the arm. Pregnant women and children require special attention, with child seats properly secured. Neglecting to wear a seat belt can reduce the effectiveness of the airbag system and increase injury risk in a collision.

7.3 Emergency Procedures

In case of an accident, the Honda CR-V 2009 Manual advises securing the vehicle, turning on hazard lights, and evacuating if safe. Check for injuries and call emergency services. If the vehicle catches fire, exit immediately and move to a safe distance. For situations like a breakdown, remain in the vehicle with seat belts fastened and use warning triangles. Always keep an emergency kit in the car. Follow these steps to ensure safety and minimize risks in critical situations.

Customization and Upgrades

Customize your Honda CR-V 2009 to enhance its functionality and style. Explore interior and exterior modifications, along with performance upgrades, to tailor your vehicle to your preferences.

8.1 Interior and Exterior Modifications

Enhance your Honda CR-V 2009 with interior and exterior modifications. Update seat upholstery, dashboard trim, and add accessories like cargo organizers. Exterior upgrades include roof rails, alloy wheels, and body kits for a personalized look. Customize lighting, spoilers, or bumpers to boost style and functionality while maintaining the vehicle’s original performance and safety standards. These modifications allow you to tailor your CR-V to your lifestyle, ensuring both comfort and a unique appearance on the road.

8.2 Performance Enhancements

Unlock your Honda CR-V 2009’s potential with performance enhancements. Upgrade the air intake system, exhaust, and suspension for improved power and handling. Lightweight alloy wheels and high-performance tires can enhance agility. Consider engine tuning or a performance chip to optimize fuel injection and boost horsepower. ECU tuning can refine engine responsiveness. Ensure all modifications are compatible with your vehicle’s specifications and consult the manual or a specialist for safe and effective upgrades that maintain reliability.

The Honda CR-V 2009 Manual concludes your journey to mastering your vehicle. It ensures you understand features, maintenance, and troubleshooting, helping you maximize performance and longevity for years to come.

9.1 Final Tips for Maximizing Your CR-V Experience

To maximize your CR-V experience, regular maintenance is key. Always refer to the 2009 Honda CR-V Manual for guidance on scheduled services and troubleshooting. Keep your vehicle in top shape by adhering to the recommended maintenance intervals and addressing any issues promptly. Utilize the manual’s diagnostic tips and safety guidelines to ensure a smooth, safe, and enjoyable driving experience for years to come.

Additional Resources

Find downloadable resources, forums, and communities for the Honda CR-V 2009 Manual. Access repair shops and specialists for further assistance and expert advice on maintenance and repairs.

10.1 Forums and Communities

Forums and communities dedicated to the Honda CR-V 2009 offer valuable resources and discussions. Join platforms like Honda CR-V forums, Reddit communities, or Facebook groups to connect with owners and enthusiasts. These spaces provide troubleshooting tips, DIY guides, and real-world insights from experienced users. Engage with experts and enthusiasts to maximize your CR-V experience and gain access to exclusive modification ideas and maintenance advice. These communities are a great way to stay informed and supported.

10.2 Repair Shops and Specialists

For professional maintenance and repairs, consider visiting authorized Honda service centers or trusted specialists. These experts are equipped with the latest tools and knowledge to handle your Honda CR-V 2009. Additionally, independent repair shops with experience in Honda models can provide cost-effective solutions. Always ensure the technicians are certified and use genuine Honda parts to maintain your vehicle’s performance and warranty. Use the manual’s guidelines to find a reliable mechanic near you.

keurig mini instruction manual

Welcome to the Keurig Mini Instruction Manual! This guide helps you understand and operate your compact‚ single-serve coffee maker. Designed for small spaces‚ it offers convenient brewing options. Follow this manual to set up‚ brew‚ and maintain your Keurig Mini for optimal performance.

1.1 Overview of the Keurig Mini Coffee Maker

The Keurig Mini is a sleek‚ compact single-serve coffee maker designed for small spaces. It offers a modern design and user-friendly interface‚ allowing you to brew coffee in sizes from 6 to 12 ounces. Perfect for apartments or offices‚ this coffee maker is easy to use and clean. With optional features like a water filter‚ it ensures fresh-tasting coffee every time. The K-Cup pod system makes it convenient to enjoy a variety of flavors. Its compact size and efficient brewing process make it a great choice for coffee lovers seeking convenience without sacrificing quality.

1.2 Importance of Reading the Manual

Reading the Keurig Mini manual is essential for optimal performance and safety. It provides step-by-step instructions for setup‚ brewing‚ and maintenance. Understanding the manual ensures proper usage‚ preventing potential damage or hazards. It also highlights key features and troubleshooting tips‚ helping you resolve common issues quickly. By following the guidelines‚ you can extend the lifespan of your coffee maker and enjoy a perfect cup every time. Additionally‚ the manual includes safety precautions to avoid electrical risks and improper handling‚ making it a crucial resource for all users.

Setting Up Your Keurig Mini

Setting up your Keurig Mini involves unboxing‚ plugging in‚ adding water‚ installing the filter (if needed)‚ and priming the brewer for the first use.

2.1 Unboxing and Initial Inspection

Welcome to the setup process! Carefully unbox your Keurig Mini and ensure all components are included. You should find the brewer‚ water reservoir‚ and K-cup holder. Place the machine on a flat‚ stable surface. Inspect for any visible damage. Remove any protective film or packaging materials. Wash your hands before handling the brewer. Locate the power button‚ water reservoir‚ and brew button. Familiarize yourself with the machine’s layout using the provided manual diagram. Ensure all parts are secure and undamaged before proceeding to the next step.

2.2 Plugging in the Coffee Maker

Locate the power cord attached to your Keurig Mini and plug it into a nearby grounded electrical outlet. Ensure the outlet is easily accessible and not overloaded with other appliances. Avoid using extension cords to maintain safety and optimal performance. Once plugged in‚ press the power button to turn on the brewer. You should see indicator lights illuminate‚ signaling the machine is ready for use. Ensure the brewer is placed on a stable‚ flat surface away from water sources to prevent electrical hazards. Proper power connection is essential for safe and efficient operation of your Keurig Mini coffee maker.

2.3 Adding Water to the Reservoir

Lift the water reservoir from the back of the Keurig Mini and fill it with fresh‚ filtered water. Ensure the water level does not exceed the maximum line indicated on the reservoir. Avoid using distilled water‚ as it may affect the brewer’s performance. Once filled‚ carefully place the reservoir back into its designated slot‚ ensuring it aligns properly with the brewer. After replacing the reservoir‚ press the brew button to initiate the first rinse cycle‚ which will discard water into a mug. This step prepares the machine for brewing your first cup of coffee. Always use clean water for optimal taste and machine longevity;

2.4 Installing the Water Filter (if applicable)

If your Keurig Mini comes with a water filter kit‚ start by soaking the new filter in fresh water for 5 minutes. Rinse it thoroughly under running water to remove any loose particles. Locate the filter holder inside the water reservoir and align the filter with the holder. Gently push the filter into place until it clicks securely. Ensure the filter is properly seated to avoid leaks. If your model does not include a filter‚ you can still use the brewer without one‚ but a filter is recommended to improve water taste and machine performance. Replace the filter every 6 months or as needed.

2.5 Priming the Brewer

Priming your Keurig Mini ensures proper water flow and prepares the machine for first use. Begin by filling the water reservoir with fresh water. Place a large mug (at least 10 oz) on the drip tray. Press and hold the brew button until water flows from the brew head. Repeat this process 2-3 times to remove any air from the lines. If water does not flow immediately‚ release the button and press it again. Continue until water flows steadily. This step is crucial for optimal performance and ensures your brewer is ready for use.

Brewing Your First Cup

Brewing your first cup with the Keurig Mini is easy! Place a K-cup‚ select your cup size‚ and press the brew button. Enjoy fresh‚ perfect coffee every time.

3.1 Pressing the Brew Button

Pressing the brew button is simple! Once your K-cup is inserted and cup size is selected‚ press the brew button. The indicator light will flash‚ then pulse as the machine heats. After about 2 minutes‚ your coffee will begin brewing. The process is quick and efficient‚ ensuring a perfect cup every time. Always ensure a mug of at least 10 ounces is placed under the spout before brewing. For a stronger flavor‚ some models offer a “strong brew” option. Pressing the brew button starts the process‚ delivering fresh‚ hot coffee directly into your cup. Enjoy your freshly brewed beverage!

3.2 Selecting Cup Size

Selecting your cup size on the Keurig Mini is straightforward. Use the control buttons to choose between 6‚ 8‚ 10‚ or 12 ounces‚ depending on your preference. Ensure your mug matches the selected size to avoid overflow. The machine adjusts brewing parameters for each size‚ ensuring optimal flavor. For a stronger brew‚ consider using the “strong brew” option if available. Always place a mug of appropriate size on the drip tray before brewing. This feature allows customization to suit your coffee needs perfectly. Your Keurig Mini is designed to deliver consistent results for any cup size you choose.

3.3 Understanding the Brewing Process

Once you press the brew button‚ the Keurig Mini begins heating water to the ideal temperature. It pierces the K-cup‚ allowing pressurized hot water to flow through the coffee grounds. This process typically takes 2-3 minutes‚ depending on cup size. The machine automatically stops when the cycle is complete. The K-cup system ensures consistent flavor and convenience. Always use a K-cup or compatible pod for optimal results. The brewing process is designed to deliver a perfect cup every time‚ with minimal effort required. This simplicity makes the Keurig Mini a user-friendly choice for coffee lovers.

Maintenance and Care

Regular maintenance ensures your Keurig Mini performs optimally. Descale every 3-6 months to remove mineral buildup. Clean the brewer weekly with a damp cloth and mild soap. Replace the water filter every 6 months or as indicated by the manufacturer. Proper care extends the lifespan and maintains the quality of your coffee. Refer to the manual for detailed instructions and recommended products to keep your Keurig Mini in excellent condition.

4.1 Descaling the Keurig Mini

Descaling is essential to remove mineral buildup and prevent water flow issues. Pour one-third of Keurig descaling solution into the water reservoir. Run a cleansing brew cycle without a K-cup. Repeat until the reservoir is empty‚ then rinse by brewing with fresh water. This process ensures optimal performance and water quality‚ extending the life of your Keurig Mini. Always use Keurig-approved descaling solutions for best results. Regular descaling every 3-6 months keeps your machine functioning smoothly and your coffee tasting great. Follow the manual for detailed step-by-step guidance on this maintenance process.

4.2 Cleaning the Brewer

Regular cleaning ensures your Keurig Mini performs optimally. Wipe the exterior with a damp cloth and dry thoroughly. Empty and rinse the drip tray daily to prevent residue buildup. For deeper cleaning‚ run a cycle with a cleaning solution or white vinegar‚ then rinse thoroughly with fresh water. Avoid harsh chemicals to maintain the machine’s finish. Cleaning the brew head and K-cup holder regularly prevents old coffee oils and residue from affecting flavor. Always unplug the brewer before cleaning for safety. Keep your Keurig Mini clean to enjoy consistent brewing performance and fresh-tasting coffee every time.

4.3 Replacing the Water Filter

Replacing the water filter in your Keurig Mini is essential for maintaining water quality and taste. Start by turning off and unplugging the brewer. Locate the water reservoir and filter. Remove the old filter and discard it. Insert the new filter into the holder‚ ensuring it clicks into place. Reattach the filter to the reservoir. Run 2-3 brew cycles without a K-cup to flush the system. Replace the filter every 6 months or as indicated by the manufacturer. This process ensures your coffee tastes fresh and prevents mineral buildup. Refer to the manual for specific filter recommendations.

Troubleshooting Common Issues

Troubleshoot common issues like no power‚ slow brewing‚ or water leaks. Check power connections‚ descale regularly‚ and ensure proper water levels. Refer to the manual for detailed solutions.

5.1 No Power or Brewer Not Turning On

If your Keurig Mini has no power or won’t turn on‚ ensure it’s properly plugged into a functioning outlet. Check the power cord for damage and confirm the outlet works. Verify the brewer is switched on and the power button is pressed firmly. If issues persist‚ unplug the unit‚ wait 30 seconds‚ and plug it back in. Ensure no circuit breakers have tripped. If the brewer still doesn’t power on‚ contact Keurig customer support for assistance or possible repair options. Regular descaling can also prevent power-related issues by maintaining optimal performance.

5.2 Coffee Not Brewing or Slow Flow

If your Keurig Mini isn’t brewing or the flow is slow‚ check the water reservoir to ensure it’s filled adequately. A low water level can disrupt the brewing process. Next‚ descale the brewer to remove mineral buildup‚ as this often causes slow flow. Clean the K-cup holder and needle to ensure proper puncture and flow. If issues persist‚ reset the brewer by unplugging it for 30 seconds. Ensure the K-cup is correctly aligned and the brew button is functioning. If the problem continues‚ contact Keurig support for further assistance or repair options to restore optimal performance.

5.3 Water Leaking or Overflowing

If your Keurig Mini is leaking or water is overflowing‚ ensure the water reservoir is properly aligned and securely locked. Check for blockages in the drain or tubes‚ as debris can cause water to back up. Descaling the brewer regularly prevents mineral buildup‚ which may lead to leaks. If the issue persists‚ inspect the reservoir for cracks or damage. Avoid overfilling the reservoir‚ as this can cause overflow. For severe leaks‚ unplug the brewer and contact Keurig customer support for repair or replacement options to resolve the issue effectively and ensure safe operation.

Additional Resources

For further assistance‚ visit Keurig’s official website for the full manual‚ customer support contact‚ and replacement parts information to ensure optimal use of your brewer.

6.1 Accessing the Full User Manual Online

To access the full Keurig Mini user manual online‚ visit the official Keurig website. Navigate to the “Support” section and search for the model-specific manual. You can download it in PDF format for easy reference. This resource provides detailed instructions‚ troubleshooting tips‚ and maintenance guides to help you make the most of your coffee maker. Ensure you have the latest version for accurate information tailored to your Keurig Mini model. Regularly check for updates to stay informed about new features or improvements.

6.2 Contacting Keurig Customer Support

If you have questions or need assistance with your Keurig Mini‚ contact Keurig Customer Support at 1.866.901.BREW (2739); Visit their official website for live chat or email support. Representatives are available to help with troubleshooting‚ maintenance‚ or replacement parts. For faster service‚ have your model number and purchase details ready. Keurig’s support team is dedicated to ensuring your brewing experience is seamless and enjoyable. Reach out anytime for expert guidance and solutions tailored to your Keurig Mini coffee maker.

6.3 Finding Replacement Parts

To find replacement parts for your Keurig Mini‚ visit Keurig’s official website at www.Keurig.com. They offer a variety of genuine parts‚ including water filters and accessories. You can search by your coffee maker’s model number to ensure compatibility. For assistance‚ contact Keurig Customer Support at 1;866.901.BREW (2739) or use their live chat feature. Authorized retailers and partners listed on their site also carry Keurig-approved parts. Always use genuine Keurig parts to maintain warranty coverage and ensure optimal performance of your brewer.

fortress safe manual

Welcome to the Fortress Safe Manual. This guide provides essential information for installing, operating, and maintaining your safe, ensuring optimal security and functionality for your valuables.

1.1 Overview of Fortress Safe Models

Fortress offers a diverse range of safe models designed to meet various security needs. From compact personal safes to large gun cabinets, each model is built with durability and reliability in mind. Popular models include the 44B20, 44E20, and 55E20, each featuring unique security enhancements. These safes are constructed with solid steel, concealed hinges, and pry-resistant designs to ensure maximum protection.

Models like the 44E20 and 55E30 come with programmable electronic locks, biometric fingerprint access, or combination locks, providing flexible security options. Many safes also include features like pre-drilled mounting holes, foam-padded interiors, and anti-theft mechanisms. Fortress safes cater to both home and office use, offering versatile solutions for securing valuables, firearms, and sensitive documents.

1.2 Importance of Reading the Manual

Reading the Fortress Safe Manual is crucial for understanding proper installation, operation, and maintenance of your safe. It provides detailed instructions for programming electronic and biometric locks, ensuring optimal security. The manual also covers essential safety precautions and troubleshooting tips to address common issues.

By following the manual, you can avoid potential errors that might compromise the safe’s security or functionality. It also outlines warranty terms and conditions, ensuring you understand coverage details. Neglecting to read the manual may lead to improper use, voiding the warranty or reducing the safe’s effectiveness. Always refer to the manual for guidance on maximizing your safe’s performance and longevity.

Installation and Setup

Secure your safe in a stable, dry location. Mounting hardware is provided for installation on concrete or wooden surfaces, ensuring the safe remains level and firmly anchored.

2.1 Physical Installation of the Safe

Begin by selecting a stable, dry, and secure location for your safe. Ensure the surface is level to prevent tipping. For concrete installation, mark mounting holes, drill, and insert masonry bolts provided. Tighten firmly to anchor the safe. Wooden surfaces require similar steps, with bolts securing the safe to the floor or wall. Avoid placing the safe in areas prone to moisture or vibrations. Once installed, ensure the safe is level and tightly fastened to prevent unauthorized movement. Always follow the manufacturer’s guidelines for secure placement and anchoring to maximize protection and stability.

2.2 Electronic Lock Programming

To program the electronic lock on your Fortress Safe, start by opening the safe using the override key. Insert the batteries into the battery compartment located on the interior back wall. Press and hold the reset button (usually found under the keypad) for 3 seconds to initialize the programming mode. Enter your desired 3-8 digit code using the keypad, then press the “Set” or “#” button to confirm. Repeat the code to ensure it is correctly stored. Test the code by locking and unlocking the safe to verify functionality. Store the override key in a secure, separate location, as instructed in the manual, to maintain maximum security.

Lock Mechanism and Features

The Fortress Safe features a programmable electronic lock and optional biometric access, ensuring secure and convenient entry. Its robust locking mechanism includes solid steel construction and advanced anti-theft features for maximum protection.

3.1 Understanding the Programmable Electronic Lock

The programmable electronic lock on your Fortress Safe offers advanced security and convenience. It allows you to set a 3-8 digit personal code for easy access. To initialize the lock, remove the silver cap on the front of the safe and follow the programming instructions. The system includes a factory code for initial setup, which you can later replace with your custom code. The lock also features a backup key system for emergency access. Once programmed, the electronic lock provides secure, tamper-proof protection for your valuables. Ensure batteries are installed correctly to maintain lock functionality. This feature combines ease of use with robust security, making it ideal for safeguarding sensitive items.

3.2 Biometric Lock Operation

The biometric lock on your Fortress Safe offers fingertip access for quick and secure entry. To use this feature, first ensure the safe is open using the override key. Enroll your fingerprint by placing your finger on the sensor and following the prompts in the manual; The system stores multiple fingerprints for shared access. If the biometric lock fails to recognize your fingerprint, use the backup key to access the safe. Regular cleaning of the sensor ensures optimal performance. This advanced feature combines convenience with high-security standards, providing fast access while maintaining the safety of your valuables. Always store backup keys securely outside the safe.

Security Features

Fortress safes feature advanced anti-theft mechanisms, including solid steel construction, pry-resistant designs, and integrated alarm systems, ensuring maximum protection for your valuables with cutting-edge security solutions.

4.1 Anti-Theft Mechanisms

Fortress safes are equipped with robust anti-theft mechanisms to ensure maximum security. Solid steel construction and pry-resistant designs prevent unauthorized access, while concealed hinges add an extra layer of protection. The safes feature active locking bolts that secure the door in place, making forced entry extremely difficult. Additionally, some models include alarm systems that trigger during tampering attempts, further deterring potential thieves. These mechanisms work together to provide a secure environment for your valuables, ensuring peace of mind against theft and unauthorized access. Regular maintenance and proper installation enhance the effectiveness of these anti-theft features, making Fortress safes a reliable choice for protecting sensitive items.

4.2 Alarm System Integration

Fortress safes feature advanced alarm systems designed to enhance security. These systems trigger during unauthorized access attempts, such as tampering or forced entry, providing an audible deterrent. Some models integrate seamlessly with home security systems, offering real-time alerts and monitoring. The Alarm-U system, available in select units, activates when suspicious activity is detected, ensuring prompt notification. This integration adds an extra layer of protection, discouraging potential intruders and providing peace of mind. Proper setup and maintenance of the alarm system are crucial for optimal performance, as outlined in the manual. This feature is a key component of Fortress safes’ comprehensive security solution.

Maintenance and Troubleshooting

Regularly inspect the lock, hinges, and bolts. Replace batteries every 2 years and ensure proper connection. Lubricate moving parts annually for smooth operation. Address issues promptly.

5.1 Regular Maintenance Tips

Regular maintenance ensures your Fortress Safe operates efficiently. Check the electronic lock functionality monthly and replace batteries every 2 years. Lubricate hinges and bolts annually with silicone spray. Inspect for wear or damage, addressing issues promptly. Clean the keypad regularly with a soft cloth to prevent dust buildup. Ensure all mounting holes are secure to maintain stability. Store emergency keys in a safe, accessible location, never inside the safe. Refer to the manual for specific troubleshooting steps if problems arise. Proper upkeep extends the life of your safe and guarantees reliable protection for your valuables.

5.2 Common Issues and Solutions

Common issues with your Fortress Safe may include low battery warnings or unresponsive electronic locks. If the lock malfunctions, ensure batteries are fresh and properly installed. For forgotten codes, refer to the manual for reset procedures. If the keypad is unresponsive, disconnect and reconnect the power supply. Mechanical issues, such as a jammed door, can often be resolved by applying silicone-based lubricant to hinges and bolts. If problems persist, contact Fortress Customer Support for assistance. Regular maintenance and troubleshooting can prevent most issues, ensuring your safe remains secure and functional. Always follow the manual’s guidelines for resolving specific concerns effectively.

Warranty and Support

Fortress Safe offers a comprehensive warranty covering manufacturing defects. Contact customer support via phone or website for assistance. Register your product for extended benefits and priority service.

6.1 Warranty Coverage Details

Fortress Safe provides a comprehensive warranty program, ensuring protection against manufacturing defects. The warranty typically covers repairs or replacements for defects in materials and workmanship. For specific models, such as the Fortress Security Safe, the warranty guarantees repair or replacement if the safe is breached due to forced entry or attack. Coverage duration varies by product, often spanning 12 months from the purchase date. To file a claim, contact Fortress Customer Support with proof of purchase and a detailed description of the issue. Registration of your product may be required for extended benefits. Terms and conditions apply; visit the official Fortress website for full warranty details.

6.2 Contacting Fortress Customer Support

For assistance with your Fortress Safe, contact customer support via phone at 888-577-9823 or visit their website for online support options. You can also reach them through their website chat or by submitting a request form. Fortress Safe offices are located at 1900 Empire Blvd., Webster, NY 14580, and 1212 S Naper Blvd Ste 119, Naperville, IL 60540-7349. Representatives are available to address warranty claims, troubleshooting, and general inquiries. Ensure to have your product details and proof of purchase ready for efficient service. For detailed support, refer to the official Fortress Safe website or downloaded PDF manual.

Additional Resources

Access the official Fortress Safe website for downloadable PDF manuals, troubleshooting guides, and customer support options to enhance your safe ownership experience.

7.1 Downloading the PDF Manual

Downloading the Fortress Safe manual as a PDF is a convenient way to access instructions anytime. Visit the official Fortress Safe website and navigate to the “Support” or “Resources” section. Use the search function to find your specific safe model, then click the download link to save the PDF manual. This ensures you always have a digital copy for easy reference. The PDF format allows you to view the manual on multiple devices, making it ideal for troubleshooting or sharing with others. Regularly check for updates to ensure you have the latest version of the manual for your safe.

7.2 Online Customer Support Options

Fortress Safe offers comprehensive online customer support to assist with any questions or issues. Visit their official website to access a variety of resources, including live chat, email support, and a detailed FAQ section. Users can also submit a contact form directly through the site for personalized assistance; Additionally, Fortress provides a toll-free phone number for immediate help. Their support team is available to address concerns related to troubleshooting, maintenance, or warranty inquiries. Online support ensures convenient access to solutions, making it easier to resolve issues quickly and efficiently. This resource is designed to enhance your experience with Fortress Safe products.

toyota 1uz manual transmission

The Toyota 1UZ engine‚ a powerful V8 known for its smoothness and reliability‚ has garnered significant interest for manual transmission swaps․ Enthusiasts seek enhanced driver engagement and control over the stock A340 automatic‚ driving a growing trend in custom conversions․ While complex‚ these swaps offer unique performance benefits‚ making them a popular modification among Toyota and Lexus enthusiasts․

Overview of the 1UZ Engine and Its Popularity

The Toyota 1UZ engine‚ a 4․0-liter V8‚ is renowned for its durability‚ smoothness‚ and reliability․ Widely used in Toyota and Lexus models‚ it gained popularity among enthusiasts for its potential in performance modifications․ Its robust design and versatility make it a favorite for swaps‚ including manual transmission conversions‚ enhancing driving engagement and customization․ The 1UZ’s reputation as a reliable powerplant has solidified its status in automotive circles‚ driving its enduring appeal for both stock and modified applications․

Why Consider a Manual Transmission Swap?

A manual transmission swap for the 1UZ engine offers enhanced driver engagement and control‚ providing a more immersive driving experience․ It eliminates the A340 automatic’s limitations‚ such as slower shifts and reduced precision․ Manual transmissions also reduce weight and improve fuel efficiency․ Enthusiasts seek this conversion to unlock the engine’s full potential‚ achieving better acceleration and responsiveness while enjoying the satisfaction of a hands-on driving experience․

Feasibility of a Manual Transmission Swap

A manual transmission swap for the 1UZ engine is feasible but complex‚ requiring custom adapter plates and bellhousing solutions․ It demands significant mechanical expertise and specialized parts․

Is a Manual Transmission Swap Possible?

A manual transmission swap for the Toyota 1UZ engine is indeed possible‚ though it requires meticulous planning and fabrication․ Enthusiasts have successfully mated the 1UZ with transmissions like the W58‚ R154‚ and ZF‚ using custom adapter plates and the 1UZ auto bellhousing․ This swap involves modifying the flywheel and clutch system to ensure compatibility‚ showcasing the engine’s versatility for performance-driven applications․

Challenges and Considerations

Performing a manual transmission swap on the 1UZ engine presents several challenges․ Custom fabrication of adapter plates and bellhousings is often necessary due to the lack of bolt-on solutions․ Additionally‚ ECU modifications are required to accommodate the manual transmission‚ and compatibility issues with the flywheel and clutch system must be addressed․ Proper engine and transmission mounting is crucial‚ and the process can be costly‚ requiring specialized tools and expertise․

Key Components for a Successful Manual Swap

Adapter plates‚ bellhousings‚ flywheel‚ clutch systems‚ and transmission options like W58 or R154 are critical for a seamless 1UZ manual transmission conversion‚ ensuring proper engine compatibility․

Adapter Plates and Bellhousing Solutions

Adapter plates and bellhousings are essential for connecting the manual transmission to the 1UZ engine․ The 1UZ auto bellhousing can often be used with manual transmissions like the W58 or R154․ Adapter plates bridge the engine and transmission‚ ensuring proper alignment․ Specialists offer kits‚ including adapter plates‚ bellhousings‚ and clutch systems‚ simplifying the swap․ Custom engineering may be required for precise fitment‚ depending on the transmission choice and vehicle setup․

Flywheel and Clutch System Requirements

The 1UZ engine requires a compatible flywheel and clutch system for manual transmission swaps․ Enthusiasts often use MR2 flywheels‚ but modifications like slotted holes may be needed to match the engine’s PCD․ The clutch must align with the chosen transmission‚ such as the W58 or R154․ A Superrunner clutch is commonly recommended for these setups․ Proper alignment ensures smooth operation‚ and some specialists offer pre-modified flywheels for easier installation․

Transmission Options (W58‚ R154‚ ZF‚ etc․)

Popular manual transmission options for the 1UZ engine include the Toyota W58 and R154‚ known for their durability and compatibility․ The BMW ZF transmission is another choice‚ offering a smooth shifting experience․ Each transmission requires specific adapter plates to mate with the 1UZ‚ ensuring proper alignment and operation․ Specialists like CRS offer rebuilt units tailored for these swaps‚ making the process more accessible for enthusiasts seeking performance and reliability․

Transmission and Engine Compatibility

Ensuring compatibility between the 1UZ engine and manual transmissions is crucial․ Adapter plates and bellhousing solutions are essential to mate the engine with popular transmissions like the W58 or ZF‚ achieving a seamless connection for optimal performance․

Matching the Transmission to the 1UZ Engine

Matching the transmission to the 1UZ engine requires careful consideration of compatibility and mechanical integration․ Popular options include the W58 and R154‚ which are well-suited for the engine’s power output․ The ZF transmission‚ commonly used in BMWs‚ is another viable choice‚ offering a 6-speed configuration․ Adapter plates and bellhousing modifications are essential to ensure proper alignment and fitment․ The 1UZ’s auto bellhousing can often be adapted for manual transmissions with custom solutions․ Additionally‚ the flywheel and clutch system must be precisely matched to the transmission‚ with options like the MR2 flywheel requiring slotted holes for compatibility․ Proper transmission and engine alignment ensures smooth operation and prevents mechanical stress․

Using the 1UZ Auto Bellhousing with Manual Transmissions

The 1UZ auto bellhousing can be adapted for manual transmissions with custom solutions․ Adapter plates are essential to mate the engine with popular transmissions like the W58 or R154․ The TREMEC T56 Magnum kit is another option‚ requiring precise measurements from the engine block to the shifter location․ This setup maintains compatibility while enabling manual control‚ offering improved driving dynamics and engagement for enthusiasts․

Wiring and Electronics Modifications

Wiring and electronics modifications are essential for integrating a manual transmission‚ requiring ECU recalibration and custom wiring harnesses to ensure compatibility and proper functionality․

ECU Modifications for Manual Transmission

ECU modifications are crucial for manual transmission swaps‚ ensuring proper communication between the engine and gearbox․ Specialists often recalibrate the ECU to remove automatic transmission dependencies and integrate manual-specific functions․ This includes adapting throttle response‚ torque management‚ and clutch engagement parameters․ Custom wiring solutions may also be required to accommodate the manual setup‚ ensuring seamless integration and optimal performance․

Wiring Harness Adaptations

Wiring harness adaptations are essential for manual transmission swaps‚ requiring custom solutions to eliminate automatic dependencies and integrate manual-specific functions․ This ensures proper communication between the engine and transmission‚ maintaining critical functions like throttle response and torque management․ The process involves detailed rewiring to accommodate the manual setup‚ ensuring seamless integration and optimal performance without compromising engine reliability․

Engine and Transmission Mounting

Proper engine and transmission mounting is critical for a smooth manual conversion‚ ensuring stability and performance․ Custom mounts often accommodate the V8’s weight and configuration․

Custom Engine Mounts for V8 Manual Conversions

Custom engine mounts are essential for Toyota 1UZ manual swaps‚ ensuring proper alignment and stability․ The V8’s weight and configuration often require tailored solutions to prevent vibrations and damage․ These mounts are designed to handle the unique stresses of manual transmissions‚ providing a secure connection between the engine and chassis․ Proper installation is critical for both reliability and performance‚ making custom mounts a key component of a successful swap․

Ensuring Proper Alignment and Fitment

Proper alignment and fitment are crucial for a seamless manual transmission swap․ The engine and transmission must be precisely aligned to prevent vibration and wear․ Custom adapter plates and mounts play a key role in maintaining proper positioning․ Ensure all components are measured and fitted accurately to avoid misalignment‚ which can lead to premature wear or failure․ Precision is essential for a smooth and reliable conversion․

Installation Process and Steps

The manual transmission swap involves installing the adapter plate‚ bellhousing‚ flywheel‚ and clutch system․ Precise alignment and connection of the transmission to the 1UZ engine is critical․

Step-by-Step Guide to the Manual Swap

Begin by removing the automatic transmission and installing the adapter plate onto the 1UZ engine․ Attach the manual transmission‚ ensuring proper alignment with the bellhousing․ Replace the flywheel and install the clutch system․ Modify the wiring harness to accommodate manual transmission signals․ Finally‚ test the setup to ensure smooth operation and adjust as necessary for optimal performance;

Testing and Fine-Tuning the Setup

After installation‚ conduct thorough testing to ensure smooth engagement and operation․ Check for proper clutch function‚ gear synchronization‚ and transmission alignment․ Fine-tune the clutch pedal feel and adjust the shifter for optimal driver comfort․ Perform test drives to evaluate acceleration and shifting smoothness‚ making adjustments as needed to achieve the desired performance and reliability․

Performance Improvements and Benefits

A manual transmission swap enhances acceleration‚ control‚ and driver engagement․ It eliminates torque converter slippage‚ offering crisper shifts and a more connected driving experience compared to the stock automatic․

Comparison to the Stock A340 Automatic

The stock A340 automatic‚ while refined‚ lacks the direct control of a manual setup․ Manual transmissions eliminate torque converter lag‚ offering quicker acceleration and more precise gear shifts․ Drivers experience enhanced connection to the vehicle‚ especially in spirited driving․ However‚ the A340’s smoothness and convenience are trade-offs for the added engagement of a manual swap‚ making it a subjective choice based on driving priorities․

Driving Dynamics and Driver Engagement

Manual transmission swaps on the 1UZ engine significantly enhance driving dynamics‚ offering direct control and precision․ The absence of torque converter lag and predictable gear shifts provide a more immersive experience․ Driver engagement is elevated‚ fostering a deeper connection with the vehicle․ This setup is particularly rewarding in performance driving scenarios‚ where the ability to manually command shifts translates to improved responsiveness and a more satisfying overall driving experience․

Cost and Budget Considerations

Manual transmission swaps for the 1UZ engine can vary significantly in cost‚ depending on parts sourcing‚ labor‚ and additional modifications‚ requiring careful budget planning and research․

Estimating the Cost of a Manual Swap

Estimating the cost of a 1UZ manual swap varies widely‚ depending on components like adapter plates‚ transmission type‚ and custom fabrication․ Adapter plates and bellhousing solutions can range from $500 to $2‚000‚ while transmissions like the W58 or R154 may cost between $1‚500 to $4‚000․ Additional expenses include flywheels‚ clutches‚ and potential labor costs for professional installation‚ making the total investment potentially exceed $6‚000 to $10‚000 or more․

Budgeting for Additional Modifications

Budgeting for additional modifications is crucial‚ as a manual swap often requires more than just the transmission․ Custom engine mounts‚ wiring harness adaptations‚ and ECU modifications can add significant costs․ Plan for extra expenses like a lightweight flywheel‚ high-performance clutch‚ and potential upgrades to the cooling system․ Labor costs for professional installation should also be considered‚ potentially doubling the overall budget depending on complexity and location․

Community Support and Resources

Forums‚ specialists‚ and aftermarket suppliers offer valuable insights and parts for 1UZ manual swaps․ Engaging with communities ensures access to expert advice and proven solutions․

Forums‚ Specialists‚ and Aftermarket Suppliers

Forums‚ Specialists‚ and Aftermarket Suppliers

Online forums and communities provide invaluable resources for 1UZ manual swaps‚ offering expert advice and troubleshooting․ Specialists like CRS and Skid-shop offer custom adapter plates and transmission kits‚ while aftermarket suppliers provide components such as flywheels and clutch systems․ These resources enable enthusiasts to source rare parts and gain insights‚ making the swap process more accessible and feasible for those pursuing a manual conversion․

Importance of Professional Help and DIY Tips

While DIY enthusiasts can tackle parts of the swap‚ professional expertise is crucial for complex tasks like wiring and adapter plate fabrication․ Specialists ensure precision and reliability‚ avoiding costly mistakes․ DIYers should thoroughly research and join forums for guidance‚ but critical tasks may require professional intervention to guarantee a successful conversion․

The Toyota 1UZ manual transmission swap offers enhanced driving engagement and performance‚ making it a rewarding modification for enthusiasts․ While challenging‚ the results justify the effort․

Is the Manual Swap Worth It?

The manual swap is worthwhile for driving enthusiasts seeking enhanced control and performance․ It offers improved acceleration‚ driver engagement‚ and a more tactile experience compared to the stock automatic; While the process is complex and costly‚ the satisfaction of a successfully executed swap and the unique driving dynamics make it a rewarding endeavor for those passionate about customization and performance․

Future of 1UZ Manual Transmission Conversions

The future of 1UZ manual swaps is promising‚ with growing enthusiast demand driving innovation․ As more specialized parts emerge‚ conversions may become more accessible and affordable․ Community support and advancements in adapter kits are expected to streamline the process‚ making manual swaps a viable option for a wider audience․ This trend highlights the enduring appeal of the 1UZ engine for performance and customization․

vista 128bpt manual

The Honeywell Vista-128BPT is a powerful commercial burglary partitioned security system designed for flexibility and advanced features, offering integration with CCTV, access control, and wireless capabilities.

1.1 Overview of the Vista-128BPT Security System

The Honeywell Vista-128BPT is a robust, partitioned security system designed for commercial and residential use, offering advanced features like burglary, CCTV, and access control integration. It supports up to 128 zones and 8 partitions, providing flexibility for managing different areas of a building. With V-Plex and wireless capabilities, the system simplifies installation and operation. Compatible with AlarmNet for remote monitoring, it ensures reliable communication and enhanced security. Its modular design allows for customization to meet specific user needs, making it a versatile solution for modern security requirements.

1.2 Key Features and Benefits

The Honeywell Vista-128BPT offers advanced features such as 128 zones, 8 partitions, and integration with CCTV and access control systems. Its V-Plex and wireless capabilities enhance installation flexibility, while AlarmNet compatibility ensures reliable communication. The system supports up to 150 user codes with assignable authority levels, providing secure access control. It also includes scheduling and automation options, allowing users to customize system settings for optimal security and convenience. These features make the Vista-128BPT a comprehensive and scalable solution for both commercial and residential security needs.

Installation and Setup

The Honeywell Vista-128BPT installation involves a comprehensive setup process, covering partitioning, system configuration, and scheduling. The system is compatible with various devices, ensuring a smooth setup experience.

2.1 System Requirements and Compatibility

The Honeywell Vista-128BPT is compatible with a wide range of devices, including V-Plex and wireless systems. It supports up to 8 partitions and integrates seamlessly with AlarmNet for remote monitoring. The system is designed to work with various Honeywell products, such as Total Connect, and is compatible with both IP and cellular communication methods. It also supports multiple keypads and wireless devices, ensuring flexibility and scalability for different security needs. Compatibility with RadioRA 2 adds home automation capabilities, enhancing its functionality beyond traditional security systems.

2.2 Step-by-Step Installation Guide

Begin by mounting the Vista-128BPT panel in a secure location, ensuring accessibility and protection from tampering. Connect the power supply and battery backup, then wire the zones according to the system configuration. Configure partitions and zones using the keypad or programming software. Test all devices and ensure proper communication with the control panel. Finally, program user codes and authority levels, and verify system functionality by arming and disarming the system. Always refer to the manual for specific wiring and configuration details to ensure a smooth setup process.

Programming the Vista-128BPT

The Vista-128BPT offers advanced programming options for zone configuration, user codes, and system settings, ensuring customized security solutions tailored to specific needs and preferences with ease.

3.1 Understanding Zone Configuration

Zone configuration is a critical aspect of the Vista-128BPT system, allowing users to define and customize security zones. Each zone represents a specific area or sensor, such as doors, windows, or motion detectors, and can be programmed with unique settings. Proper configuration ensures accurate detection and response to security events. Zones can be designated as perimeter, interior, or 24-hour, with options for silent or audible alerts. Understanding zone types and their responses is essential for maximizing system functionality and ensuring reliable security coverage.

3.2 Managing User Codes and Authority Levels

Managing user codes and authority levels on the Vista-128BPT ensures secure system access. User codes can be created and assigned to individuals, with authority levels determining their permissions. Master and Manager-level users can add, edit, or delete codes, while basic users have limited access. Authority levels define whether users can perform actions like arming/disarming, bypassing zones, or viewing event logs. Customizing these settings enhances security by restricting access to sensitive functions, ensuring only authorized personnel can make system changes or view critical information.

Integration Capabilities

The Vista-128BPT allows you to create and manage user codes with varying authority levels. Master and Manager-level users can add or modify codes, while basic users have limited access. Authority levels determine permissions for actions like arming/disarming and bypassing zones. This ensures that only authorized individuals can perform specific tasks, enhancing system security and customization.

4.1 Compatible Systems and Devices

The Honeywell Vista-128BPT integrates seamlessly with various systems and devices, including AlarmNet communicators, V-Plex expanders, and wireless sensors like the 5828 keypad. It also supports Tuxedo Touch keypads for advanced control and home automation systems such as RadioRA 2, enabling lighting and temperature management. Additionally, it works with access control devices and CCTV systems, offering a comprehensive security solution. This versatility allows users to customize their security setup to meet specific needs, ensuring enhanced functionality and streamlined operation across all integrated components.

4.2 Setting Up Integration with Other Systems

Integrating the Honeywell Vista-128BPT with other systems enhances functionality. To set up integration, enable communication ports and configure device addresses. For instance, RadioRA 2 requires linking through specific triggers, while Tuxedo Touch keypads need address assignments. Ensure all systems are compatible and follow the manufacturer’s guidelines. Test integration thoroughly to confirm seamless operation. Proper setup ensures enhanced security, lighting, and automation capabilities, providing a unified control experience for users. This step is crucial for maximizing the system’s potential and delivering a robust security solution.

Partitioning and System Flexibility

The Honeywell Vista-128BPT supports partitioning, enabling independent arming and disarming of multiple areas within a building, enhancing security customization and system adaptability for diverse user needs.

5.1 What is Partitioning?

Partitioning in the Honeywell Vista-128BPT allows the system to be divided into multiple independent security areas, each with its own arming and disarming capabilities. This feature is ideal for businesses or large properties where different sections require separate security controls. Each partition operates independently, enabling specific areas to be armed or disarmed without affecting others. This enhances flexibility and customization, ensuring tailored security solutions for diverse user needs while maintaining overall system integrity and functionality.

5.2 Configuring Partitions for Enhanced Security

Configuring partitions on the Honeywell Vista-128BPT involves defining independent security zones, each with unique arming/disarming controls. Determine the number of partitions (up to 8) based on your security needs. Assign authority levels to users, ensuring only authorized individuals can control specific partitions. Zones within each partition must be properly configured to ensure accurate system responses. Test partition functionality by arming and disarming individual areas to verify proper operation. This setup enhances security by allowing tailored access and control, optimizing system performance for diverse applications;

Security Codes and User Management

Create and manage user codes with assigned authority levels. Master and Manager users can add new users, each with unique codes and access permissions, ensuring system security and accountability.

6.1 Creating and Managing User Codes

Creating and managing user codes on the Honeywell Vista-128BPT involves assigning unique codes to users with specific authority levels. Master and Manager-level users can add, edit, or delete codes, ensuring only authorized individuals access the system. Each code is linked to a user profile, defining their permissions. Regularly updating codes enhances security. The system supports multiple codes, allowing tailored access for different users. This feature ensures flexibility and accountability, making it easy to manage user access efficiently.

6.2 Assigning Authority Levels

Assigning authority levels on the Honeywell Vista-128BPT ensures users have appropriate access to system functions. Authority levels range from Master to Manager, each granting specific permissions. Master-level users can configure system settings, add or delete users, and manage authority levels. Manager-level users have limited access, such as arming/disarming and bypassing zones. Lower-level users are restricted to basic operations. Authority levels prevent unauthorized access to critical system functions, maintaining security and control. Proper assignment ensures only qualified users can perform advanced tasks, enhancing overall system protection and accountability.

Troubleshooting Common Issues

Troubleshooting the Honeywell Vista-128BPT involves identifying issues like sensor malfunctions or communication errors using diagnostic tools and error codes to resolve problems efficiently and restore system functionality.

7.1 Identifying and Solving Common Problems

Common issues with the Honeywell Vista-128BPT often involve sensor malfunctions, communication errors, or programming glitches. Users can identify problems by checking system status messages or reviewing event logs. For zone-related issues, verify zone integrity and ensure sensors are properly connected. Keypad errors may require resetting or updating firmware. Addressing these problems typically involves recalibrating sensors, resetting zones, or reviewing system configurations. Regular maintenance and updates can prevent recurring issues and ensure optimal system performance. Always refer to the manual for specific troubleshooting steps tailored to your system setup.

7.2 Diagnostic Tools and Error Codes

The Honeywell Vista-128BPT features advanced diagnostic tools to identify and resolve system issues efficiently. Error codes provide specific insights into problems, such as zone faults or communication failures. Users can access detailed logs and system status reports to pinpoint malfunctions. Common error codes like “FF” indicate general system faults, while “12” signals communication issues. Utilizing these tools allows for quick troubleshooting and ensures the system operates reliably. Regularly reviewing error codes and logs helps maintain optimal security and minimizes downtime, ensuring your system remains robust and responsive to potential threats.

Advanced Features and Customization

The Honeywell Vista-128BPT offers advanced scheduling, automation, and integration with smart home devices. Customizable settings include zone configurations, user authority levels, and system automation for enhanced security and convenience.

8.1 Scheduling and Automation

The Honeywell Vista-128BPT supports sophisticated scheduling and automation features, enabling users to program specific security actions at set times. This includes arming or disarming the system automatically, activating lights, or adjusting temperature settings. Automation can be tailored to daily routines or specific events, enhancing convenience and energy efficiency. Users can also integrate with smart home devices, such as lights and thermostats, for a seamless security and automation experience. These features are easily configurable through the system’s user-friendly interface.

8.2 Customizing System Settings

The Honeywell Vista-128BPT allows users to tailor system settings for personalized security and convenience. Options include custom arming/disarming schedules, lighting control integration, and temperature adjustments. Users can program event-based actions, such as activating lights upon entry, enhancing both security and convenience. These settings are typically configured via the system’s advanced menu using the keypad. Testing customized settings is crucial to ensure functionality and avoid false alarms. Refer to the manual for detailed guidance on accessing and modifying these features effectively.

The Honeywell Vista-128BPT offers a robust, flexible, and user-friendly security solution, ideal for both residential and commercial applications. Its advanced features, integration capabilities, and ease of customization make it a reliable choice for modern security needs.

9.1 Summary of Key Points

The Honeywell Vista-128BPT is a robust security system offering advanced features like partitioning, scheduling, and integration with CCTV and access control. It supports both wired and wireless devices, ensuring flexibility and scalability.

With compatibility for various communication formats and user-friendly customization options, the Vista-128BPT is ideal for both residential and commercial applications, providing reliable security tailored to diverse needs and preferences.

9.2 Final Tips for Optimal Use

To maximize the performance of your Honeywell Vista-128BPT, ensure proper installation and regular system updates. Familiarize yourself with the user manual to understand all features and settings. Regularly test your system to identify and address any issues promptly. Customize user codes and authority levels to enhance security. Lastly, consider professional assistance for complex configurations to ensure your system operates at its best;

1 2 3 4 5 6 11